
All-On-X surgery draws on many different aspects of oral & maxillofacial surgery. This is one reason the procedure is so challenging, yet fun and rewarding at the same time.
Because this procedure involves many different surgical skillsets and techniques, it is tempting to use countless different surgical instruments.
There is obvious, inherent value in having the right tool for the job. There is also, however, value in simplifying the All-On-X procedure, which is all too often made more complex than it needs to be.
In my practice, I have worked to assemble an instrument setup that provides me the ability to perform my surgeries at the highest level, but that also maximizes efficiency and helps simplify the procedure.
My goal is always to provide the highest quality surgery, as efficiently as possible – in that order.
Being able to consistently achieve these goals entails the following:
1. Being comfortable and familiar with my instrumentation so I can operate confidently. In order to do this, I have to repeatedly use the same instruments during the same parts of the surgery – each and every time.
2. Utilizing the instrumentation on hand effectively and efficiently. Switching back and forth between instruments and/or being uncertain of what instrument to use is inefficient, disrupts surgical flow, and distracts me from my surgical focus.
3. Having enough instruments to perform quality surgery, without having a surplus that confuses and distracts my team and creates a disorganized surgical field.
I have hand selected my instrument setup to accomplish these goals. Every instrument has a purpose. Everything I do in surgery has a reason.
If I find myself doing something just because, I stop. I don’t do it anymore. That instrument comes off the tray. The goal should always be – no wasted movement or motion.
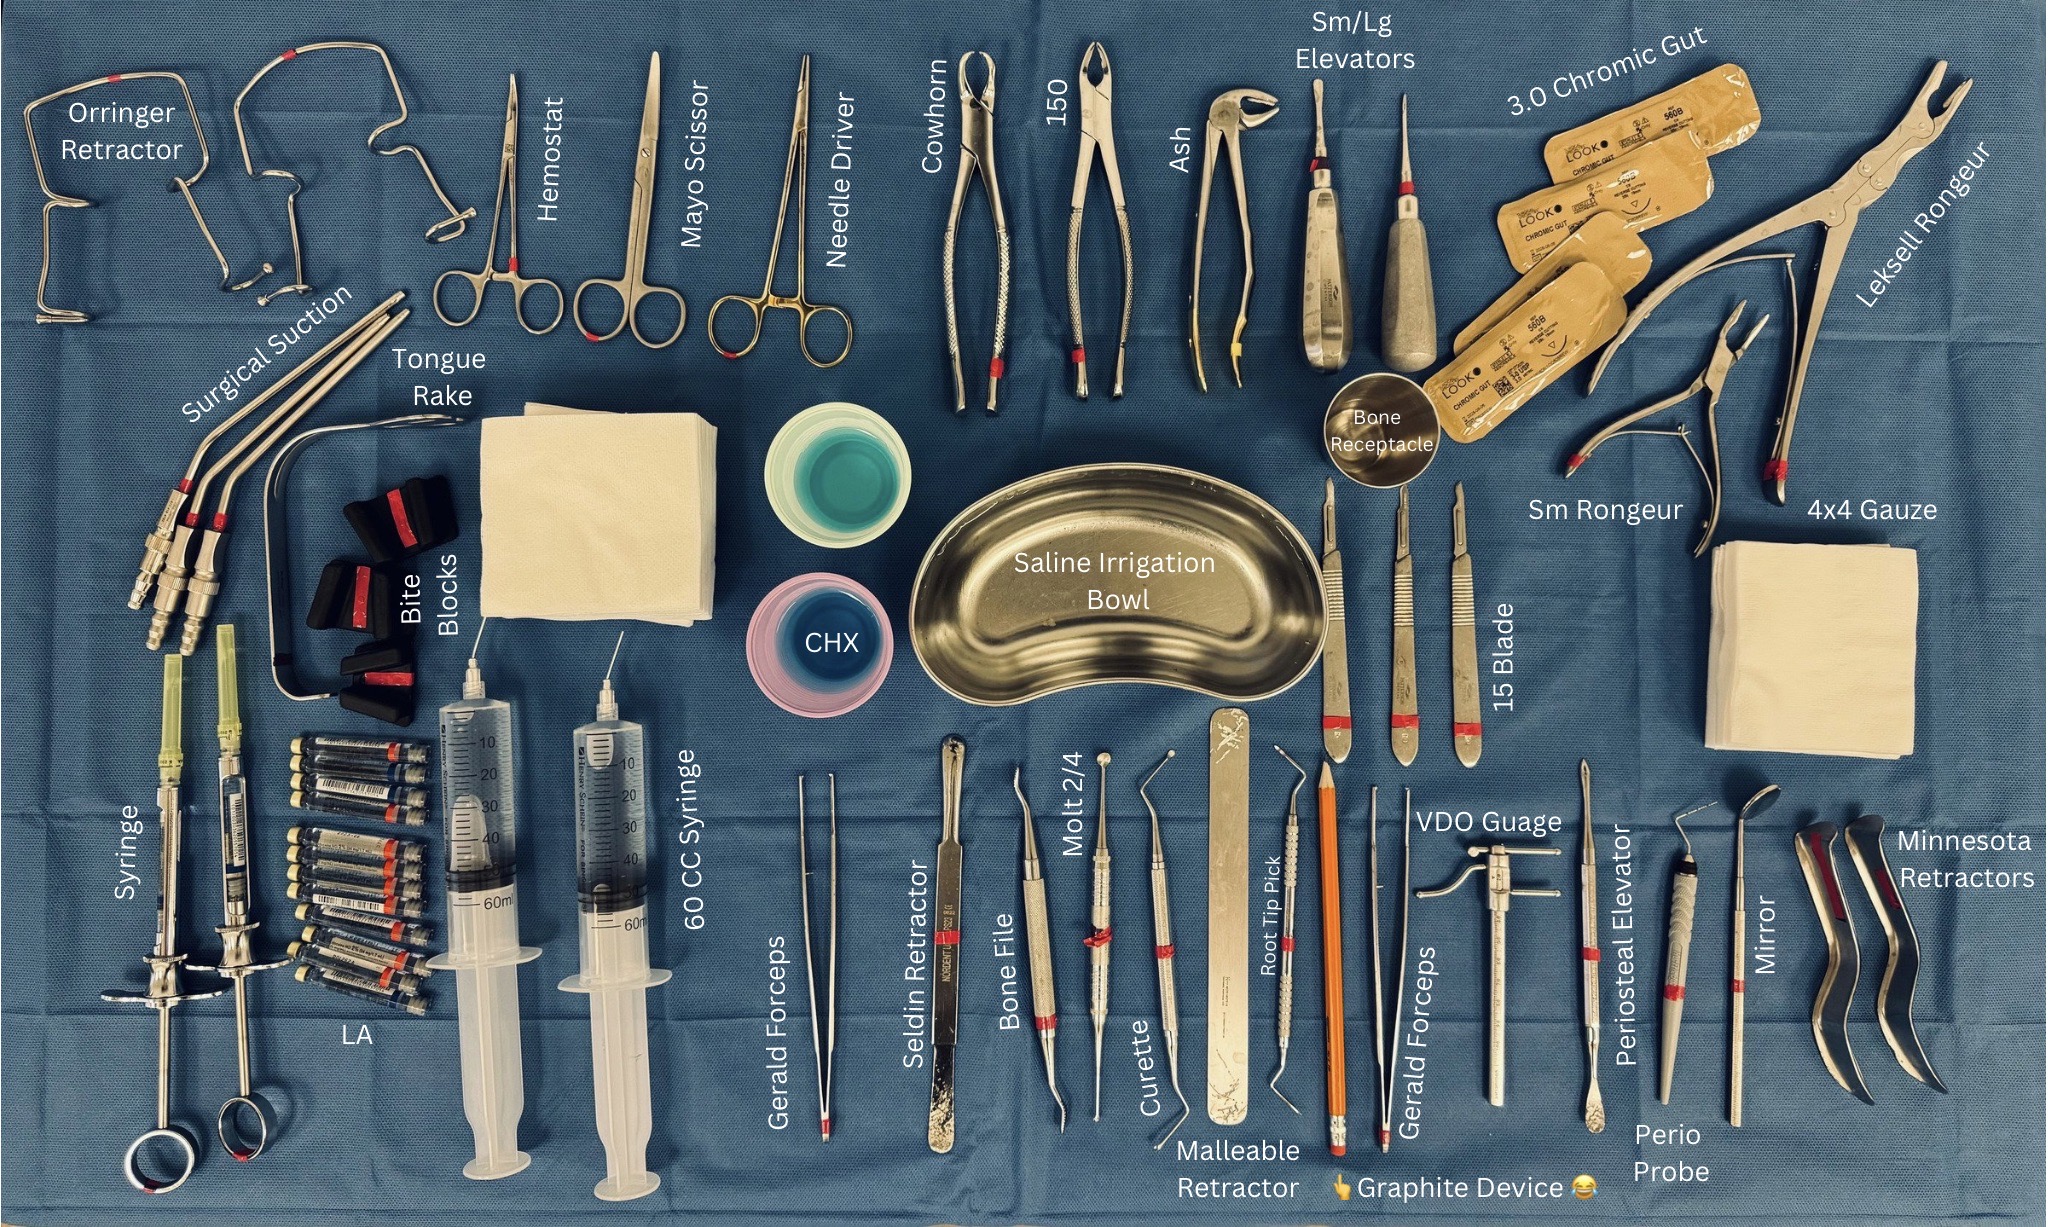
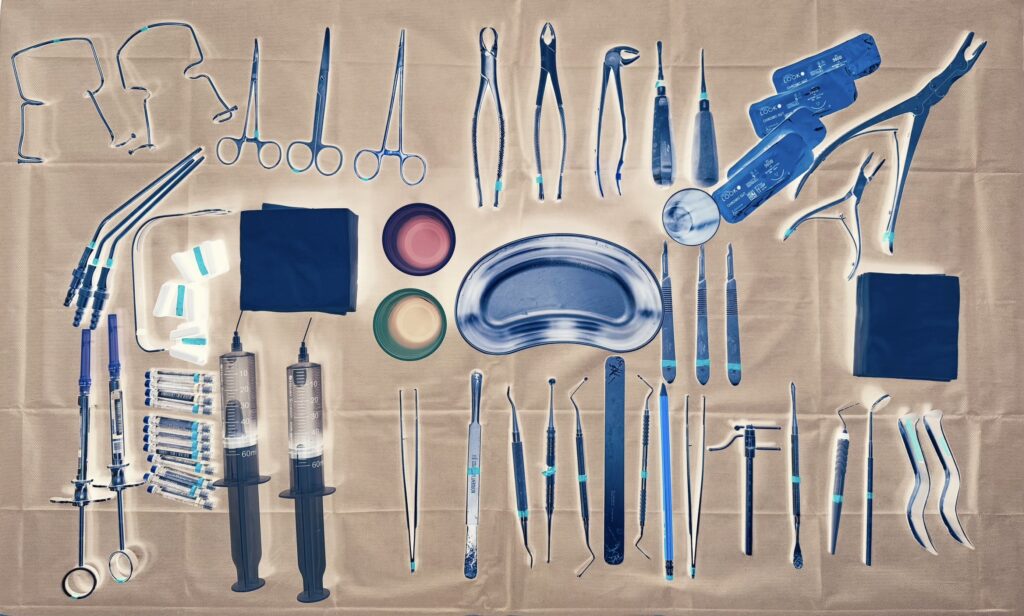
Shown above is the instrument setup I have on the mayo stand in front of me for every All-On-X case I perform.
Below, is a brief explanation as to why and how I use each instrument.
Please note that you do not have to use these exact instruments to perform a great All-On-X surgery. This is simply what I use…
What… & Why?
Orringer Retractor: Retracts the patient’s upper and lower lips to provide a full view of the surgical field. Also allows the assistant to control the upper and lower lip tension and surgical field visibility with the lower bar on the retractor. This is the first thing that goes in the patient’s mouth when surgery starts. I cannot work without this…
Hemostat: Used by my assistant to secure the surgical suction to the patient’s drape so that the suction tubing does not fall during surgery. The hemostat is readily available should an acute surgical need arise.
Mayo Scissors: Cuts sutures. I prefer the blunt tipped mayo scissors as I have been stuck one too many times by my assistants with sharp ended scissors…
Needle Driver: Controls and manipulates suture and suture needle during closure. This is the ONLY thing these are used for (as it should be).
Cowhorn Forceps: Extracts mandibular molars.
150 Universal Forceps: Extracts maxillary molars and pre-molars, as well as any maxillary or mandibular roots fractured at/or near the alveolar crest.
Ash Forceps: Extracts mandibular pre-molars as well as all maxillary and mandibular conical rooted anterior teeth (ie. canine-canine).
Small Straight Elevator: Elevates every tooth (that is not already mobile) prior to removal with forcep. Remember that I take teeth out BEFORE making incision.
Large Straight Elevator: Elevates teeth that are difficult to mobilize and/or have large spaces between them. Not used on every single case.
3.0 Chromic Gut Suture: Used for closure for every AOX case. Two sutures provided to close each arch (4 total for a double arch).
Small Rongeur: Removes gingival papilla following incision with 15 blade.
Biomet Leksell Rongeur: After a confirmed bone reduction line is drawn with a sterilized pencil, this rongeur performs the initial bone reduction, doing 90% of the heavy lifting. A barrel bur will then smooth any irregularities. This is a must have in my book!
4×4 Gauze: Placed as throat pack. Used as needed intra-operatively to slow bleeding and keep surgical field clear.
Blade Handle w/15 Blade: Performs incision. A fresh blade is typically used for each quadrant.
Bone Receptacle: Bone debris/shavings from the reduction are saved for any necessary grafting.
Saline Irrigation Bowl: Saline irrigation is drawn into 60 cc syringes from this bowl.
Chlorhexidine: Troughed, “duplicated” guides are placed in Chlorhexidine prior to being used surgically.
Small & Large Bite Blocks: Used if patient opening is inadequate to properly use or orient instrumentation.
Tongue Rake: Protects patient tongue during removal of dentition and bone reduction. Controls tongue as needed during closure.
Surgical Suction: Suction of blood to keep surgical field dry. An actual surgical suction is utilized with a finger hole to control the force of suction depending on whether the area being suctioned is hard or soft tissue (a plastic suction tip without a finger hole is not near as effective…).
Syringe w/27 Gauge Long Needle: Delivery of local anesthetic. Note that two syringes are always present so that my assistants can load and pass the local without me having to stop or pause.
Local Anesthetic: Both Lidocaine with epinephrine and Marcaine with epinephrine are utilized.
60 cc Irrigation Syringe w/20 Gauge Blunt Tip Needle: Provides irrigation during reduction and osteotomy preparation as well as irrigation of the surgical sites prior to closure for removal of any bone debris. I prefer manual irrigation to built in handpiece irrigation.
Gerald Forceps: Handles and manipulates soft tissue and needle during closure. I prefer the Gerald to the Adson as the longer forcep gives me more access and control in the posterior maxilla and mandible.
Seldin Retractor: Retracts mandibular lingual soft tissue during trans-osseous suture placement. Also used during bone reduction, although I normally prefer the malleable retractor. Some patients, however, will present with a constricted or V shaped anterior mandible and the malleable retractor will not properly fit in this constricted area. In these cases the Seldin is more effective in the anterior mandible for retraction of the midline, lingual soft tissue during reduction.
Bone File: Used on a semi-regular basis in the posterior aspect of the maxilla to smooth any rough reduction areas just anterior to the pterygomaxillary pillar. I continue my reduction along the full extent of the posterior maxilla. The most posterior aspect of this area can be difficult to achieve adequate soft tissue retraction and the barrel bur can scrape/cut soft tissue in this region. Due to the lack of bone density in the tuberosity region, a bone file can adequately smooth any irregularities following the initial rongeur and barrel bur reduction.
Molt 2/4 Periosteal Elevator: Effective for subperiosteal dissection of the mandibular anterior, lingual tissues in patients with a constricted or V shaped mandible. At times it can actually be difficult to fit a #9 periosteal elevator in this region. Caution should be taken not to tear this tissue as vessels in this area can cause a significant bleed. The Molt can be helpful in these situations. I also use the molt for a finer subperiosteal dissection around mandibular tori so as not to tear the tissue.
Curette: Removes granulomas and benign pathology. I do NOT curette every socket. This is only used to remove actual granulomatous lesions.
Malleable Retractor: My go-to for soft tissue retraction and protection during both maxillary and mandibular bone reduction.
Root Tip Pick: Removal of root tips.
Sterilized Surgical Graphite Device 🙂 Used to denote planned bone reduction line as well as implant sites, including implant angulation to guide placement. Truly one of the most affordable, yet most valuable pieces of surgical equipment on this setup.
Gerald Forceps (2nd Pair): Note that there are always two Gerald forceps available. This is because I will utilize one in each hand when manipulating and placing PRF.
VDO Gauge: Confirms that intra-operative VDO following bone reduction, matches planned post-operative VDO.
#9 Periosteal Elevator: Performs subperiosteal reflection of maxillary and mandibular flaps following incision.
Periodontal Probe: Confirms a bony stop is present following each osteotomy. Allows for measurement and marking of planned implant sites from adjacent anatomical landmarks. An incredible “tactile” AOX instrument that is often overlooked and underutilized.
Dental Mirror: Present as needed to help visualize a small, posterior maxillary root tip.
Minnesota Retractor: Maintains flap reflection for adequate visualization of the surgical field. Two retractors are always present on the mayo… since I frequently drop one at some point throughout the case 😬.
Secondary Mayo Stand

Bien Air Surgical Drill: 80,000 rpm. 1:2 straight hand-piece for extractions and bone reduction. 20:1 contra-angle handpiece for implant osteotomies and implant placement with capability of up to 80 N-cm of torque.
703 Bur: Troughs maxilla prior to Leksell rongeur reduction. Assists with extractions prn.
702 Bur: Used during placement of mandibular trans-osseous sutures.
Barrel Bur: Smooths reduction following Leksell rongeurs.
Small/Tapered Conical Bur: Smooths mandibular “shelf” on lingual aspect adjacent second/third molars to help limit chance of post-operative mandibular dehiscence or bone spicule in this area.
Neodent Implant Kit
Noris Medical 2.0 Sharp Pterygoid Osteotome with Mallet: Not shown but always on second mayo stand. Utilized to locate pterygomaxillary pillar when pterygoid implants are indicated.
Quality.
Systematic.
Repeatable.
Efficient.
This is what I strive for in my surgeries…and in my surgical setup.
Matthew Krieger DMD
very helpful , thank you , do you use any loops , what magnification and I notice head light , any recommendations
Hi Joseph,
1. I do not use any loupes. I have not used loupes since dental school. I personally do not like them during surgery and feel that it prevents me from seeing the whole surgical field. That being said, I do not think it’s “wrong” to wear loupes – it’s simply surgeon preference.
2. I use the BiLumix headlight. I feel that it works well for me. While I don’t feel the need for loops – I cannot work without a headlight!