

Ahhh, abutment placement. The end of the surgery is near. You can relax a little. Your mind might start to wander a bit. Your team may even begin to remove a few instruments off your mayo stand.
You begin to ponder your abutment choices. Maybe you take the cute little try-in abutments and place one here, maybe one there. Rotate a little here, and a little there.
As you gaze down at your MUA placement, you feel that things look pretty good. You give yourself a pat on the back.
You try in the upper guide. Doesn’t look too bad. You try in the lower guide. Looks… ok. I mean, you do have to move the access trough a little to optimize the abutment position. But hey, nobody saw that slight shift in the troughed guide position. The restorative doctor can definitely work with this, right? Yeah. Ok then, time to close.
Does this sound like someone you know?
It reminds me of myself when I first began my All-On-X journey.
After fumbling around with countless abutment placements and abutment “checks”, I felt like there had to be a better way to systematically place and assess abutments in the arch.
My philosophy, is that there should be a reason for everything we do in AOX surgery. This is true, even down to the order in which we place our abutments.
After much trial and error, I came up with the following strategic sequence I use to place and evaluate my abutments – each and every time I place them.
Abutment Placement: A Strategic Sequence
Abutments are placed in the following order:
- Maxillary Anterior Abutments
- Maxillary Posterior Abutments
- Mandibular Anterior Abutments
- Mandibular Posterior Abutments
Now, the more important part of this discussion…
Why?
Maxillary Anterior Abutments
The maxillary anterior abutments are always placed first.
The maxilla is fixed and does not move. This provides the inherent ability for a more accurate placement and assessment of abutments.
Furthermore, the maxilla has the presence of the hard palate, which makes positioning a troughed guide easy and reproducible.
I therefore start with the maxillary MUA’s because I can accurately seat the guide on the maxilla. This is almost never the case on the mandible.
More importantly, the maxillary anterior abutments are placed first because the number one complaint from AOX patients is the presence of a bulky palatal or lingual flange.
Because of this, my first priority is positioning the maxillary anterior abutments in a way that minimizes palatal bulk and produces as thin a prosthetic palatal flange as possible.

Maxillary Posterior Abutments
Once I have the anterior abutments positioned to accomplish an optimal prosthetic screw access and thin palatal flange, I then match the posterior MUA’s to the anterior MUA’s.
In theory, I can adjust the posterior abutment angulation, with little to no effect on the prosthetic. This is because regardless of the angle of the abutment, a rotation of the implant can usually bring the MUA back to the desired central fossa position of the posterior dentition. This assumes of course that the path of draw is restorable.
The point being is that there is a great deal more prosthetic flexibility with the posterior implants than the anterior implants. It is easier to achieve a more ideal prosthetic by matching the posterior abutments to the anterior abutments, than the other way around.
There is also a higher patient dissatisfaction with anterior abutment selection than posterior.
Therefore, the priority is always placed on the anterior abutments first, and posterior abutments are then selected to account for the anterior angulation and ensure a restorable path of draw.
Mandibular Anterior Abutments
Similar to the maxilla, the anterior mandibular abutments are placed first and the posterior abutments are placed last.
This provides optimal prosthetic flexibility, as well as the ability to prioritize the elimination of the lingual flange. These goals are best accomplished by matching the posterior MUA’s to the anterior MUA’s, after an ideal anterior position is achieved.
But why do the mandible after the maxilla?
A troughed mandibular guide is not necessarily reproducible. You can move it or float it around without any true anatomic stop or reference. So you really don’t know where your abutments should be based on the mandibular trough alone.
Just think back to all those times you’ve “magically” positioned the mandibular guide perfectly around your abutments, yet for some reason the final prosthetic didn’t seem to replicate your flawless intra-operative assessment.
Full disclosure, I don’t use a mandibular guide to dictate initial bone reduction and I don’t use it for assessment of abutment placement. Other than a quick intra-operative VDO confirmation, I don’t use the mandibular troughed guide at all.
Why don’t I use the mandibular guide for abutment assessment? Because I place and optimize my maxillary abutments first.
Here’s the real value in this technique…
Since the maxilla is accurate and easily reproducible, and we have already placed maxillary abutments that are on the money, we can now simply match the mandible to the maxilla. After all, that’s what occlusion is right?
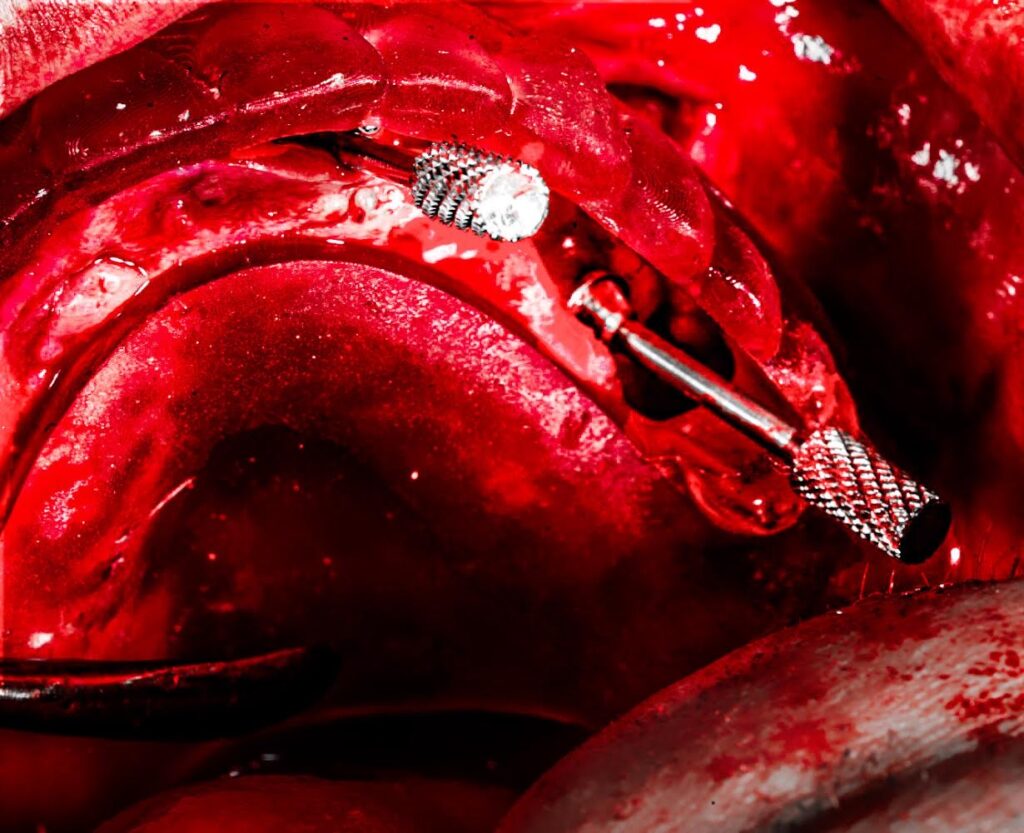
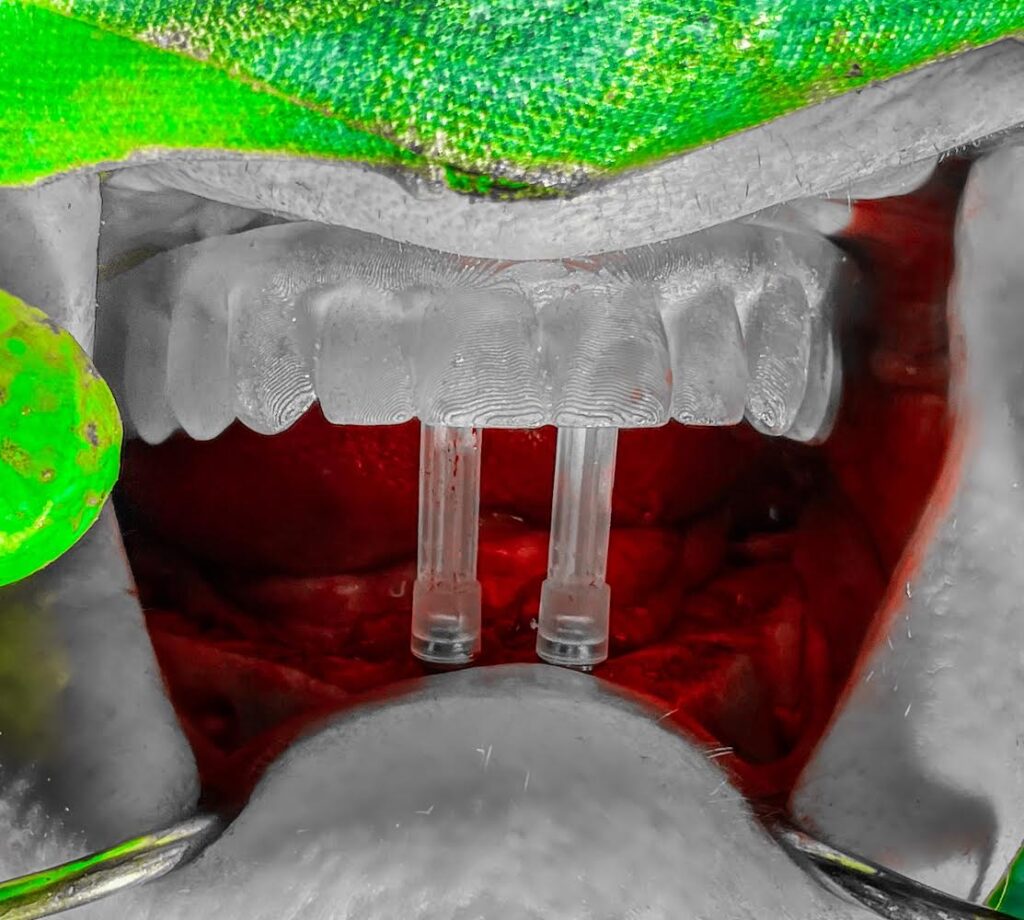
In order to do this, my mandibular anterior abutments are placed first, with guide pins on. The maxillary troughed guide is seated in the mouth in the same accurate, reproducible position used prior. I then work to optimize the lower anterior abutments so that the guide pins are hitting the cingulum of the maxillary anterior teeth when the jaw is moved toward a closed position. This replicates a natural occlusion and creates an ideal screw access position in this anatomical region.
More importantly, this creates a naturally thin (or as thin as possible) lingual flange. This is what patients actually want and notice.
Mandibular Posterior Abutments
Again, just as was done on the maxilla, the mandibular posterior abutments are placed after the anterior abutments so that they can be “matched” to the most optimal anterior position.
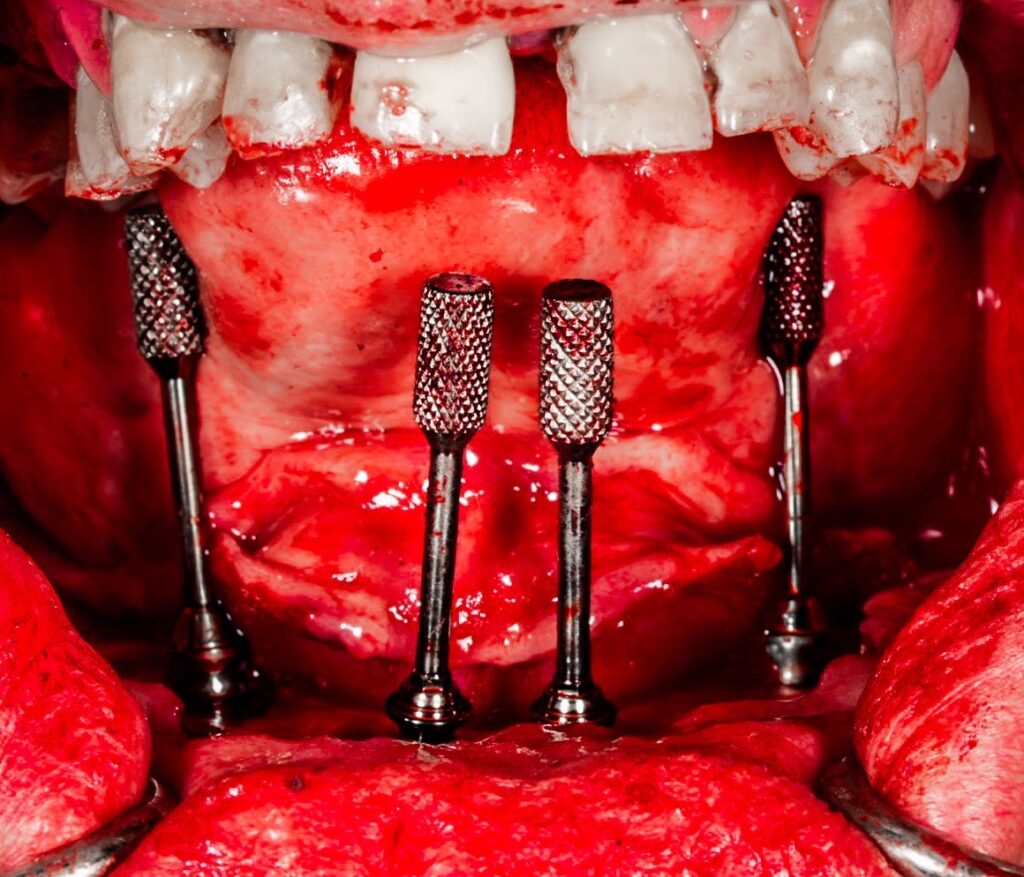
In order to create the most ideal screw access hole in the posterior mandible, abutments are placed for assessment with guide pins on. The maxillary guide is re-seated and the abutments are positioned in such a way that the posterior mandibular guide pins come in contact with the maxillary lingual cusps of the troughed guide (or natural dentition). This replicates a natural occlusion and creates close to ideal access holes exiting the central fossa of the mandibular posterior dentition.
If you are so inclined, feel free to throw that mandibular troughed guide aside. Well, ok, your restorative doc may need it to check VDO…
But now that you are a highly trained AOX surgeon – all you need is a maxillary troughed guide to create both a beautiful maxillary and mandibular prosthetic outcome.
If you give it a try, maximizing simplicity may just give you some of your best results yet.
Enjoy –
Matthew Krieger DMD
P.S.
I do not perform traditional “guided surgery”. I have only ever operated “free-hand” for all of my full arch surgeries. The “troughed guide” I am referring to, is simply an acrylic denture with a trough to allow visualization of abutment emergence sites.
P.P.S
All of my screw access holes and prosthetic “flanges” are not perfect. No surgeon’s are (this is even true in “fully guided cases”). But I actively try to improve my prosthetic screw access so that it is as optimal as possible for both my prosthodontist and patient. If you don’t actively pay attention to this aspect of your surgery, you will not get better at it. We need to always remember that this is a prosthetically driven procedure, and operate as such.
Pingback: How to Use a Maxillary Guide to Fine Tune Your Mandibular Abutments - AOX Surgery