

An All-On-X surgeon should not look at an incision as a way to create access to their surgical field. This is merely a byproduct of the incision.
An All-On-X surgeon should see their incision, first and foremost, as the initial step in their closure.
An experienced AOX surgeon understands that the second they lay their blade into the soft tissue, they are setting the tone for how well, or how poorly their tissue will close.
While I always attempt to perform my arches efficiently, I can promise you that I spend more time than the majority of surgeons on my closure.
This is also why I spend more time than most surgeons on my incision and its design.
In order to understand how I perform my incision, let’s first understand why I feel closure is so important.
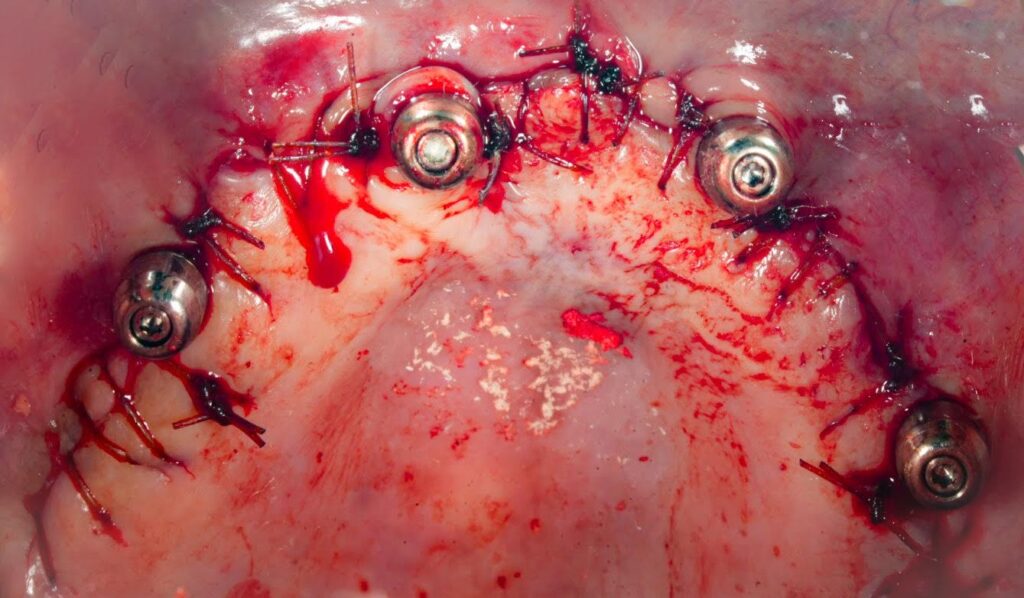
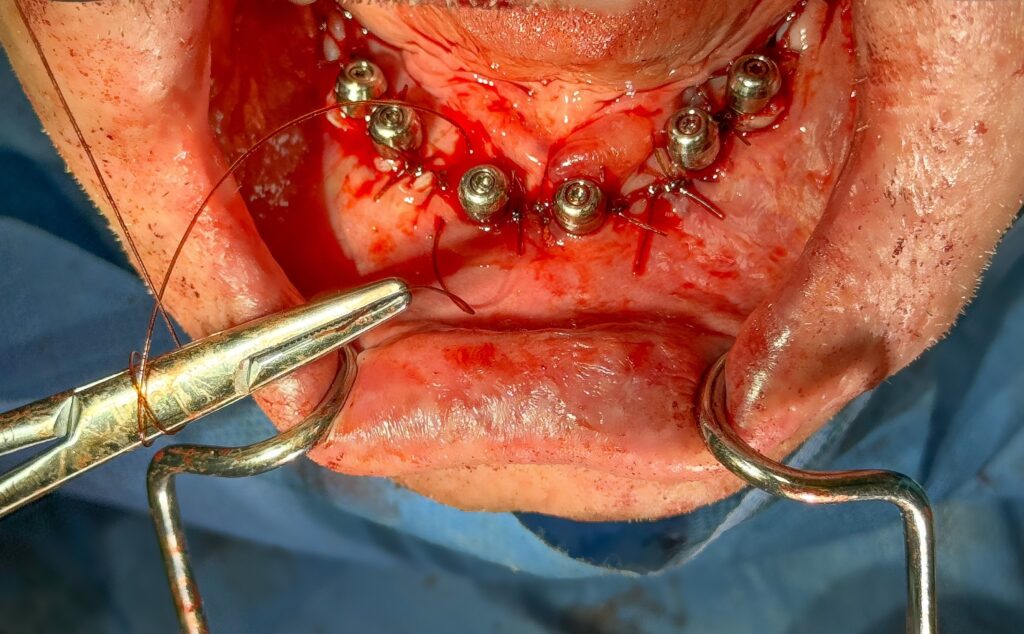
- I believe that a well done closure with level, well approximated tissue margins, and a snug fit around abutments, improves both acute healing and long term peri-implant health.
- Lumpy, uneven tissue will create a more likely site of food impaction than level, flat tissue when healed.
- Tissue closure is one of the only things your restorative doctor ever sees! If you send them a case with sloppy closure, that only makes them assume that’s how you do your whole surgery! And they may be right…
- Depending on when your prosthetic is delivered (same day chair-side, back at the restorative doctor’s office, or next day) – there is the possibility your patients will look in their mouth and see their incision and closure. While they may not understand everything, many patients know what rushed or thrown together looks like.
- Finally… Just Because! I take a lot of pride in my work and I want it to look clean, precise and meticulous even if it doesn’t make a difference at all. I should hope you feel this way too.
Now that we have a clear understanding of why closure is important. Let’s take a look at how I perform the first step of my closure – my incision.
How I Perform My AOX Incision to Create Optimal Closure
1. Take Teeth Out First.
As mentioned in Why I Take Teeth Out First and Make Incision Second, there are many benefits to removing teeth prior to incision. One of the most important being, the ease with which you are able to make an exact, closure-favorable incision.
2. Maxillary Incision
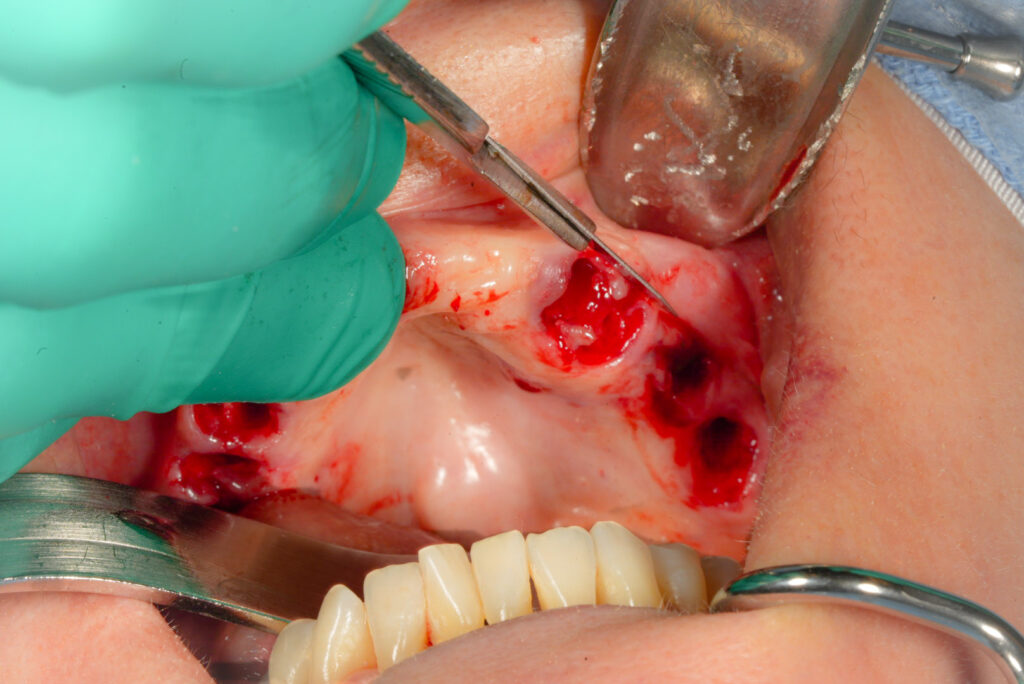
I utilize a 15 blade (blade choice is your preference) to start my incision in the third molar region.
I always ensure my incision is far enough back to allow me access to the ptergyomaxillary region. This allows for addition of a ptergyoid implant should it be needed unexpectedly during a case.
I start the incision with a slight buccal extension (emphasis on slight). I feel this creates easier access for flap reflection.
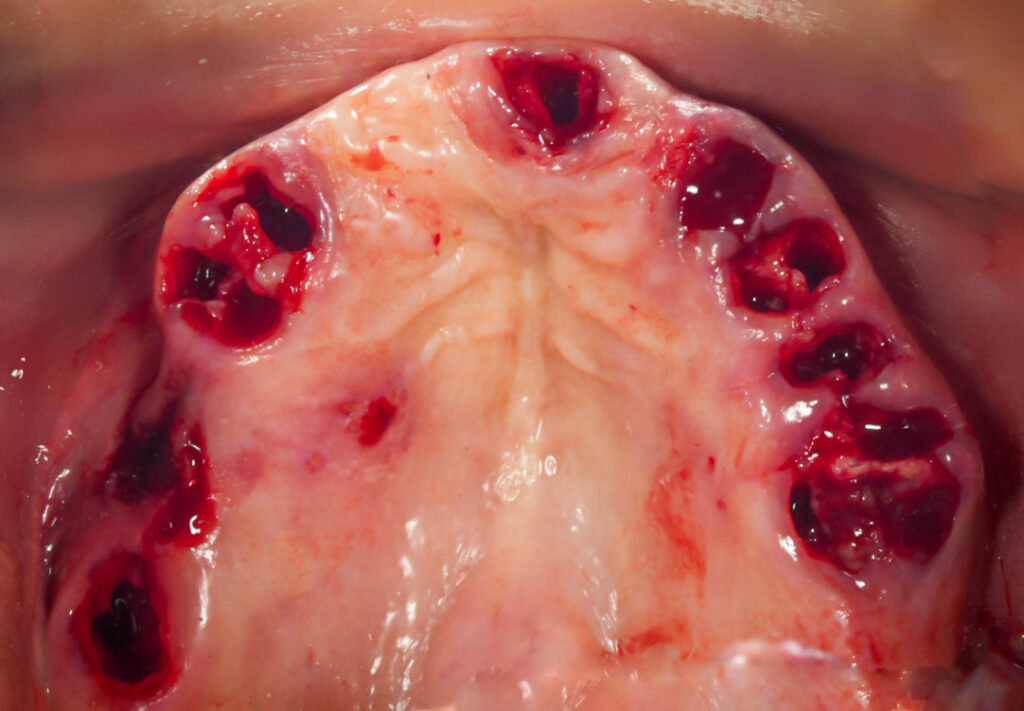
I continue the incision along the buccal aspect (as opposed to the palatal aspect) just below the existing papilla, and carry the incision across the arch to the midline. I want all of the papilla incised (not yet removed) to create a smooth straight line.
The key is to leave as much keratinized tissue as possible, while still achieving a smooth straight line. This is much easier to accomplish with the teeth already removed and the tissue still adhered to the arch.
I then do the same thing on the contralateral side.
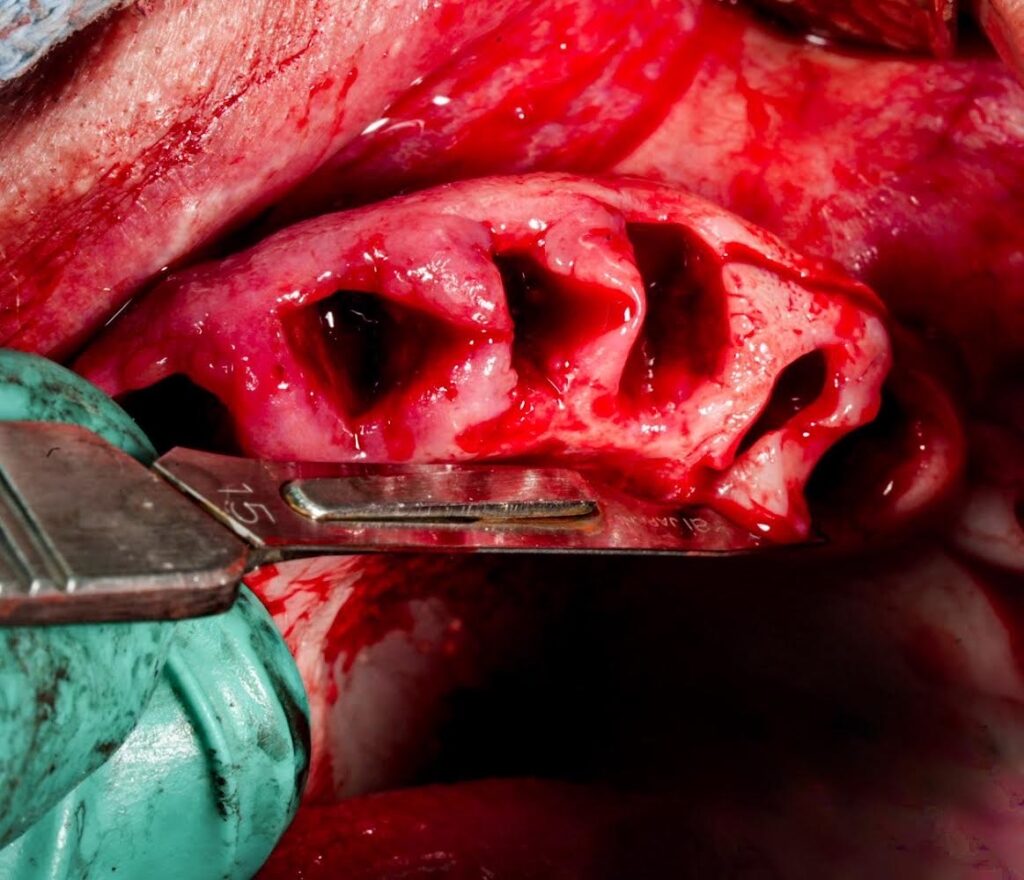
At this point I take my blade and work posterior to midline in a similar fashion along the palate. Incising the papilla in a smooth straight line. Again, this is much easier with the teeth removed. The absence of teeth also allows you a more advantageous, vertical blade position in the posterior.
I want to point out that in edentulous areas of otherwise dentate patients, I still incise a smooth straight line on both the buccal and palatal aspect of the ridge ~2-5mm apart depending on the planned reduction. If I do not remove this “strip” of tissue, following reduction there will be an excess and “overlap” of tissue in this area.
In a completely edentulous patient, however, I do not normally find it necessary to remove any tissue unless extensive bone reduction is required.
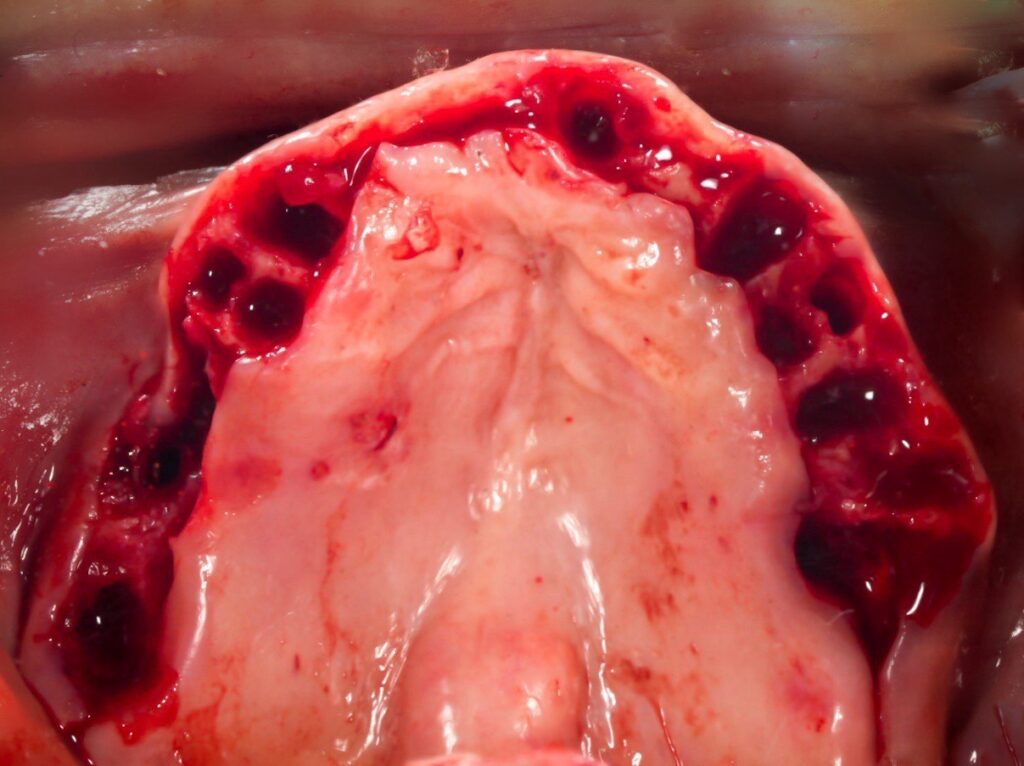
Now that all of the papilla have been incised, I take a small rongeur and remove the papilla. They often come off in strips of multiple attached papilla.

At this point you have a masterpiece worthy canvas of tissue. The tissue is smooth, follows the ridge form well, and has just enough tissue remaining to allow for primary re-approximation without extra bulk or bunching of the soft tissue – all while maintaining as much keratinized tissue as possible.
Now you can reflect your flap.
Flap reflection is easier, more efficient, and less likely to result in a tear without the teeth in place and with a smooth, healthy tissue margin.
3. Mandibular Incision
The mandibular incision is carried out in a similar fashion with a few slightly different key points to note.
Emphasis is placed on a buccal extension (aka a hockey stick style extension) as part of the incision in the third molar region to avoid the lingual nerve.
Also note that there is typically less keratinized tissue in the mandible and attention should be given to preserving as much as possible – while at times this can be difficult.
Otherwise, incision technique mirrors the maxilla.
It is my opinion that our incision and our closure should be two of the most “focused” times during our surgeries, as well as two aspects of our surgeries where the most time is spent.
This attention to detail and pride in our craft will pay dividends in the acute healing of our patients, in long term peri-implant health, and in the respect we receive from our referrals for a job well done.
The next time you reach for that 15 blade, remember, an incision is never just an incision. It is always the first step in your closure.
Matthew Krieger DMD
Great article !
Thanks Stanley!
What are your thoughts on AOX surgery for patients with poor oral hygiene, severe periodontitis, and copious amounts of plaque/calculus/anaerobic bacteria? Do you proceed with extractions/implants/immediate loading? Or do you have them get their hygiene under control first?
Hey Shae,
This is a great question! So much so, that you have inspired me to write an upcoming article about it. Stay tuned and I will answer this question in a detailed blog post!
great article, well done, thank you for sharing .
Thanks Joseph!!
Pingback: Why I Can’t Operate Without a Perio Probe - AOX Surgery
Pingback: Exactly How I Close My All-On-X Incision - AOX Surgery
Excellent article and information! Thank you!
Thank you! Glad it was helpful!