
We’ve all been there. Some, more frequently than others.
We’re proud of the All-On-X case we just completed. Another one in the books. While closing our surgical site, we are deep in thought of what a great surgeon everyone must think we are…
As we place our last stitch on the mandible, we snap out of our dream-like state only to see that it appears our abutments have all vanished? How can that be?
As we move the tissue around in a slight panic, we find those healing caps once again. Ahhh, no big deal we presume. The restorative doctor can easily find the abutments if they move the tissue a little left… then a little right… then push down one at a time.
Hey it was a tough case – it’s the least they can do!
I’m going to interrupt right here.
If you restore your own cases, you know how incredibly annoying this is and how much more difficult mobile, unsecured mandibular tissue makes the pick-up!
If you only perform the surgery aspect (like myself), your restorative provider probably tells you, “Great surgery. Thanks”!
But I can promise you that what they really want to say is,
“Thanks for the case. Your closure was awful by the way!”
So how do we fix this issue?
Let’s begin by explaining why this is typically only a problem on the mandible.
The mandible presents with the following:
- The tongue and the floor of the mouth. These provide constant movement and more laxity in the tissue.
- More mucosal tissue and less keratinized tissue than the maxilla (there is no palate).
- More freely moveable and less attached tissue than the maxilla (there is no palate).
The maxilla, for the exact opposite reasons listed above, tends not to have this problem and a routine closure is usually adequate to allow access to abutments and immobility of the soft tissues.
Now that we know that movement and laxity of the mandibular tissue is the problem, we have to find a way to secure the tissue and prevent that movement.
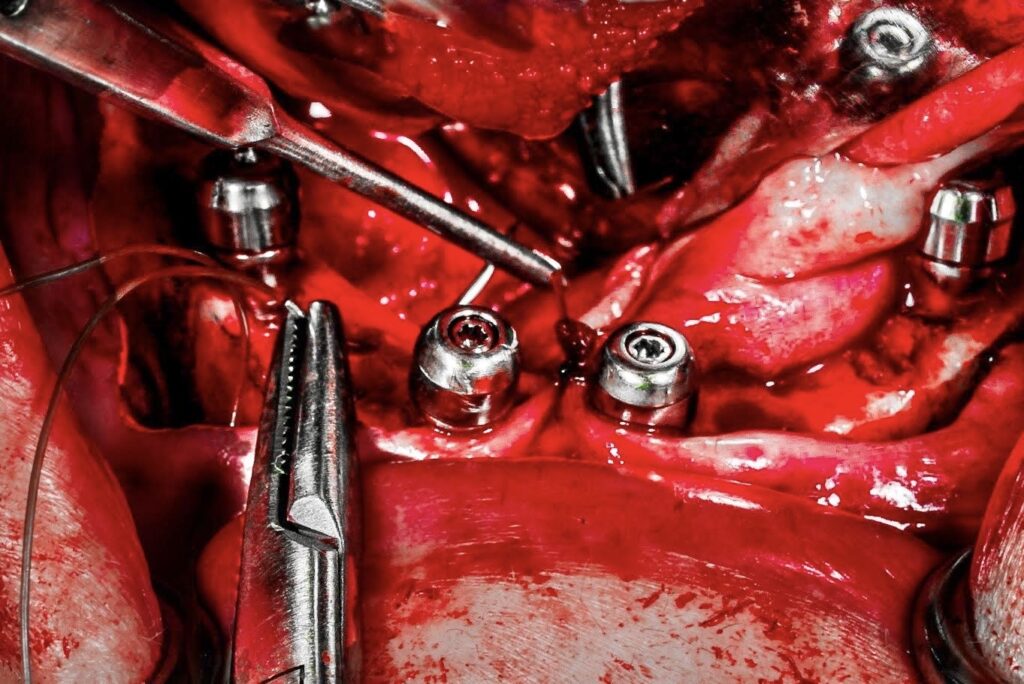
A simple, efficient, and very effective way to do this is to perform transosseous sutures at key locations. These are small, alveolar osteotomies between implants, that suture is passed through to tack the tissue down.
I do this on virtually every single mandibular arch I complete. The only exception is an extremely atrophic and/or edentulous mandible. In this scenario, I do not find it necessary to immobilize the tissue as there is not an excess of tissue in the first place. Furthermore, in notably atrophic cases I do not want to be drilling transosseous holes in the minimal, but precious bone adjacent my implants.
Here’s How I Perform My Transosseous Sutures
Instruments Utilized: Orringer Retractor, Seldin Retractor, 702 Bur, Straight Handpiece, Saline Irrigation, Gerald Forceps, Needle Driver, 3.0 Chromic Gut on a C-6 Needle.
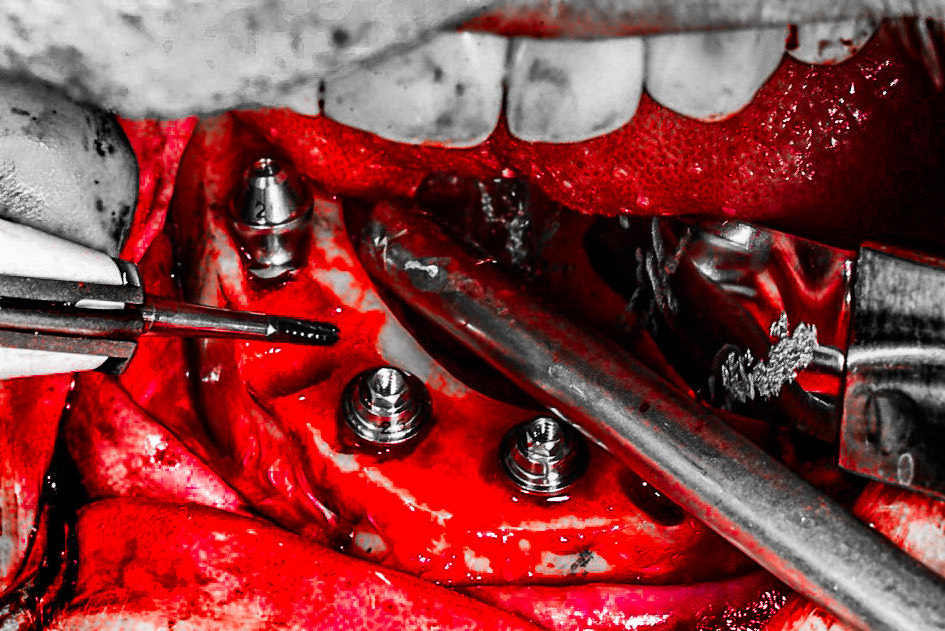
1. This technique is completed at the end of the procedure, right before I am ready to close.
2. In order to create the osteotomies, I position the drill facing buccal to lingual. You can angle however you want – but if you’re using a true surgical handpiece, you’ll find it hard to fit your drill inside the mouth and angle lingual to buccal.
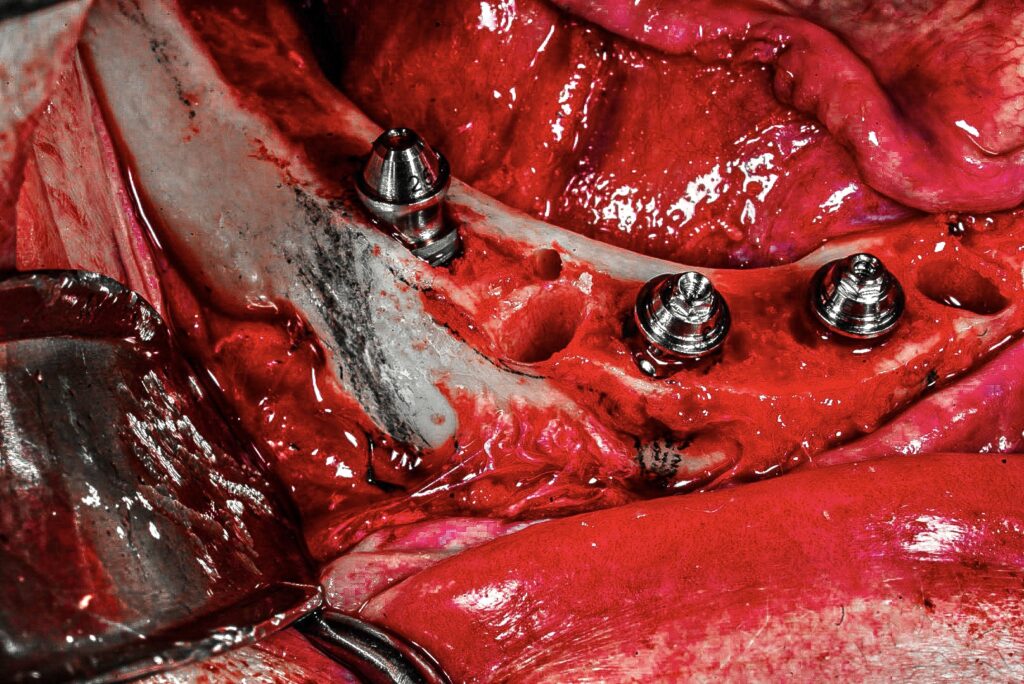
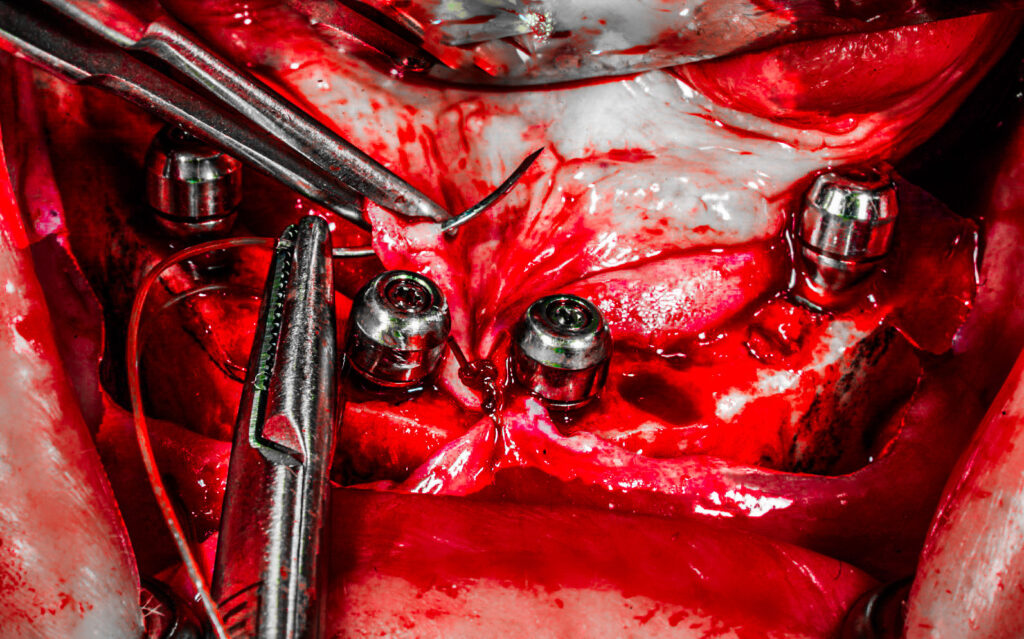
3. I perform two osteotomies, one between each pair of posterior implant sites.
Note that I used to perform three osteotomies, which included an anterior osteotomy between implants #23/26. However, I noticed a slightly higher wound dehiscence rate in the anterior midline as a result. Since moving to only two posterior osteotomies, I have seen the anterior dehiscence almost completely resolve. Furthermore, I find that 2 transosseous sutures placed posteriorly are more than adequate to secure the tissue firmly around all abutments.
4. During drilling of the osteotomies, the chairside assistant irrigates and suctions.
5. The second surgical assistant pulls gently on the Orringer retractor to tent out the lip. This is key! Due to the handpiece angulation necessary, this prevents your drill from inadvertently catching the patient’s lip. If you are not doing this, you will very likely catch the patient’s lip at some point.
6. I hold the 702 drill and handpiece in one hand. My other hand positions a Seldin retractor between the lingual tissue and lingual aspect of the bone. This protects the lingual tissue when the bur perforates the lingual cortex.
7. After the osteotomies are drilled (with copious irrigation) I begin closure with 3.0 chromic gut suture. You can use whatever you prefer – but I advise something that is resorbable.
– This is where the dance begins. –
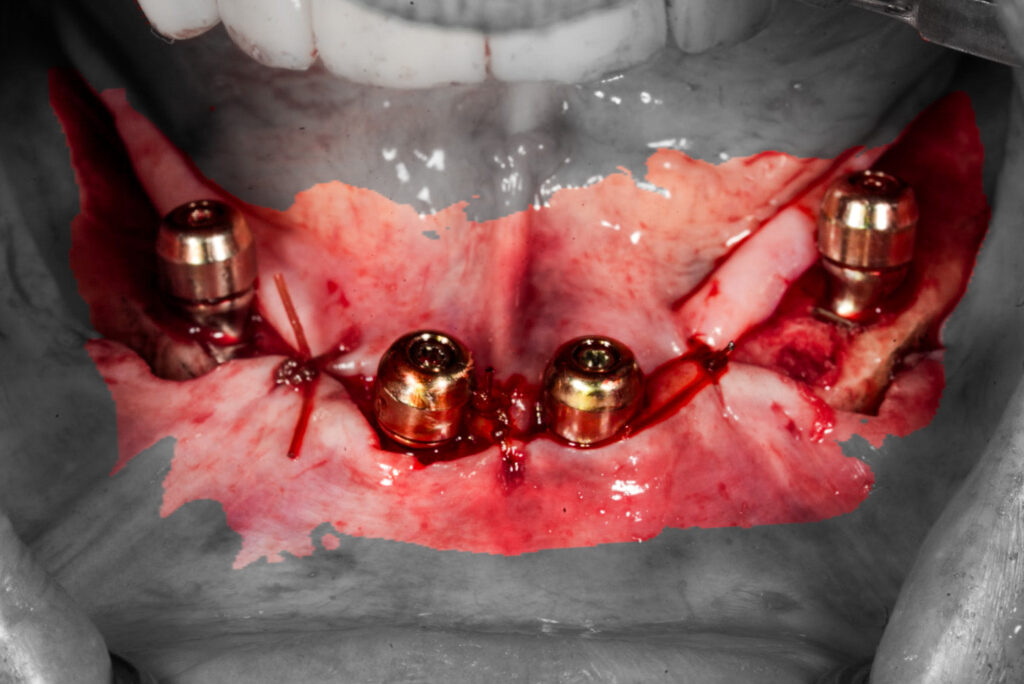
8. While there is no midline osteotomy, I tack my midline anterior tissue between #24/25 first, so that my midline is on. I then begin placing the transosseous sutures between implants #29/26 (closest to me) and between #20/23 (furthest from me).
9. I hold a needle driver with 3.0 CG suture in one hand, and a Gerald forceps in the other.
10. My chairside assistant suctions while also positioning a Seldin retractor to reflect the lingual tissue and provide visualization of the crestal and lingual aspects of the osteotomy.
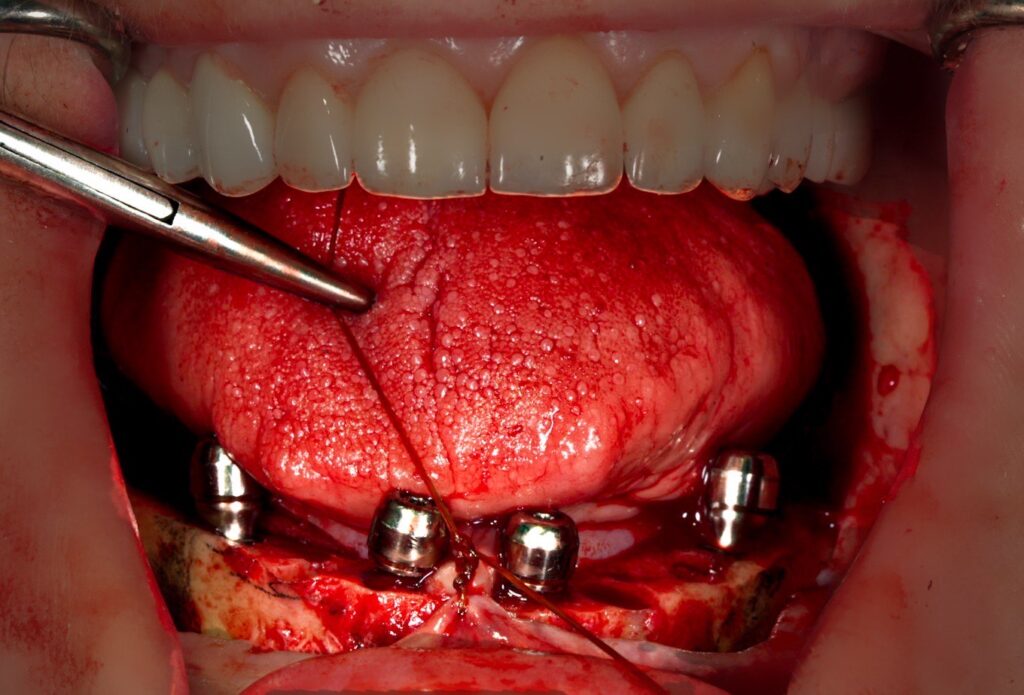
11. I pass the suture through the buccal tissue.
12. I then grab the needle and pass it through the osteotomy. While it is sometimes possible to pass through both the buccal tissue and the osteotomy at once, I find this more difficult and less predictable. I therefore divide it into two passes.
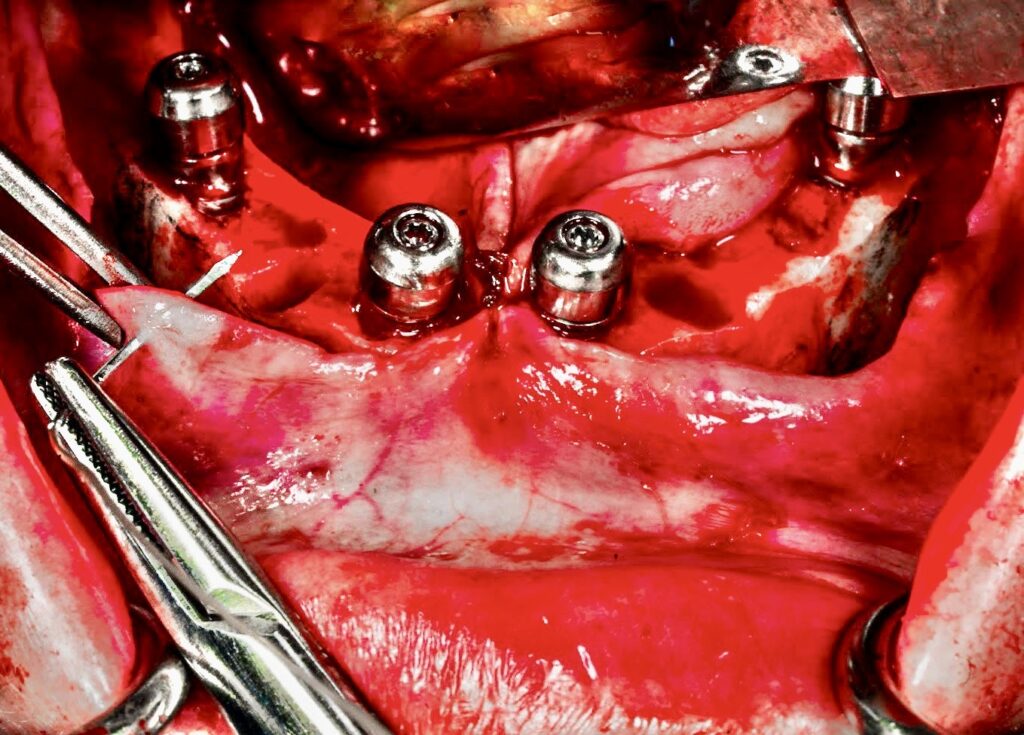
13. At this point my assistant moves the retractor back to the tongue only, allowing me to clearly visualize and pick-up the lingual tissue with my forceps.
14. I then pass the needle through the lingual tissue and complete my suture tie.
While there are 14 steps to get to this point, keep in mind that once you have learned this “dance” – this all happens in a matter of seconds.
15. After I complete the two transosseous sutures, I finish my closure as I normally would, running a stitch between each set of implants (I do not run one continuous suture). I still run a suture over the transosseous suture. The transosseus suture provides stability for the tissue, but it is not adequate in and of itself as a “lone” suture in this region.
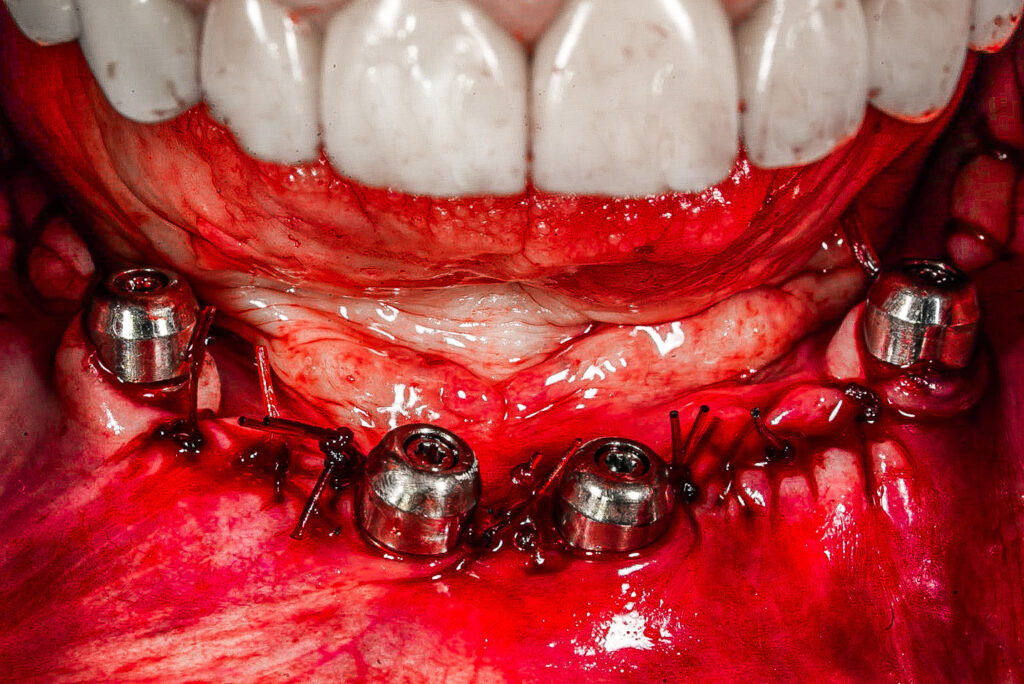
Now sit back and wait for your restorative provider to say “Great case – thanks”… and actually mean it!
This will make their life sooo much easier! It’s the least we can do!
Matt Krieger DMD
this is very well done, nice suturing , i never done it this way, i will from now on , i like it , thank you .
a smart question 🙂 about the flap how far back you go and any vertical release
thanks
Hi Joseph,
Thanks for the feedback!
As far as flap design on the mandible, I do extend almost all the way back to the retromolar pad region much like you would for an impacted wisdom tooth. My incision is actually the exact same incision that I would make for removal of an impacted mandibular wisdom tooth. ***I make a “hockey-stick style” release (the release is angled at 30-45 degrees to the buccal) in order to AVOID the lingual nerve in this region. Although not always necessary, I try to carry my reduction all the way back to this region so that the jaw has a complete, flat, uniform bone shelf throughout.
I will be posting an upcoming article regarding exactly how I make my incisions on both the maxilla and mandible so keep your eyes out for those.
Thanks!
Pingback: Exactly How I Close My All-On-X Incision - AOX Surgery
Pingback: Your AOX Questions Answered (Part 1) - AOX Surgery