
We’ve all been there…
45 minutes into an All-On-X “digital” treatment planning session with [insert your implant company of choice], wondering why this process takes sooo long…
For those of us that have chosen to skip the help of the implant planning rep, we default to the all powerful, computer generated, 3D implants that move around the screen and dictate whether we can perform a case or not.
I have many friends and colleagues that spend up to an hour moving these implants around to plan a case. Even a more devastating waste of time if a case is determined to “not be doable” based on bone availability.
I’ve been there.
One of my biggest concerns when I started doing All-On-X cases full time was,
“How will I find the time to treatment plan all of these cases?!”
Through a combination of learning from those who came before me, trial and error, and creating a systematic, repeatable protocol, I now routinely plan each of my AOX cases in 2 minutes or less.
And no…I am not “trying to be fast”, and I am definitely not sloppy. I am highly detail oriented in everything I do.
Below I have outlined the protocol that I use to plan each and every AOX case that I perform.
Tip: Keep in mind that my go to implant sizes are 4×13 mm for posterior sites and 4×11.5 mm for anterior sites.
When assessing a CT scan I am initially looking to see if I can place those sizes of implants. So as you’ll see in some of these photos, I may stop at 11.5mm or 13mm with my ruler, because I know I have the real estate I need for that specific implant.
Krieger’s AOX CT Scan Treatment Planning Protocol:
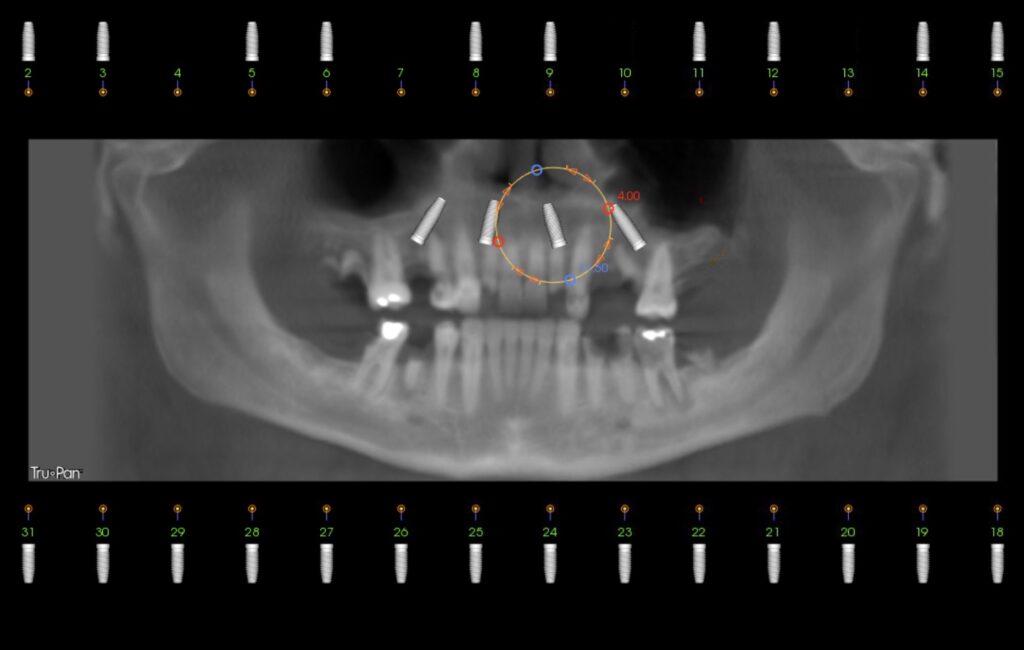
- Take an eagle’s eye view of the Panorex image (Time Allotted: 15 seconds)
- Look for position of maxillary second bicuspid in relation to maxillary sinus.
-
- Are you able to achieve adequate spread with traditional AOX?
- Outline proposed posterior implant sites with ruler. This will provide your posterior length measurement.
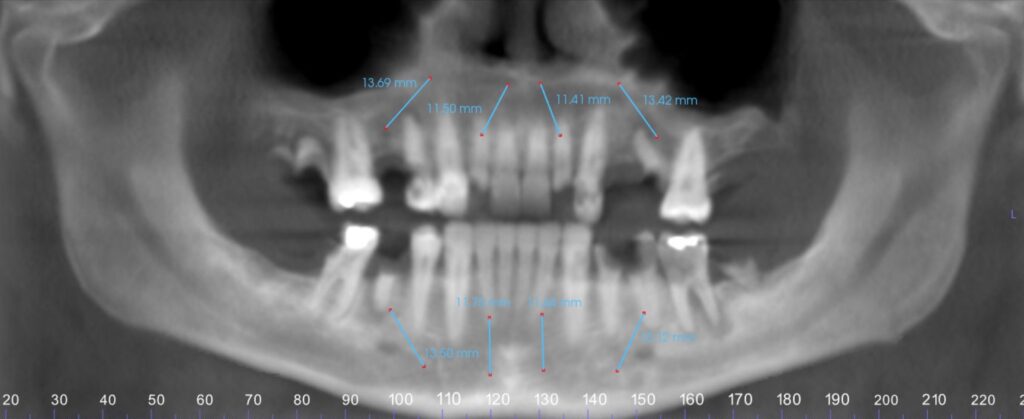
- Scroll through the Coronal CT image (Time Allotted: 30 seconds)
- Measure width of maxillary and mandibular bone at posterior implant sites (normally second bicuspid).
- Remember to measure width where your planned reduction will be, not necessarily at the alveolar crest.
- This will provide your posterior implant width sizes (implant lengths provided in Step 1).
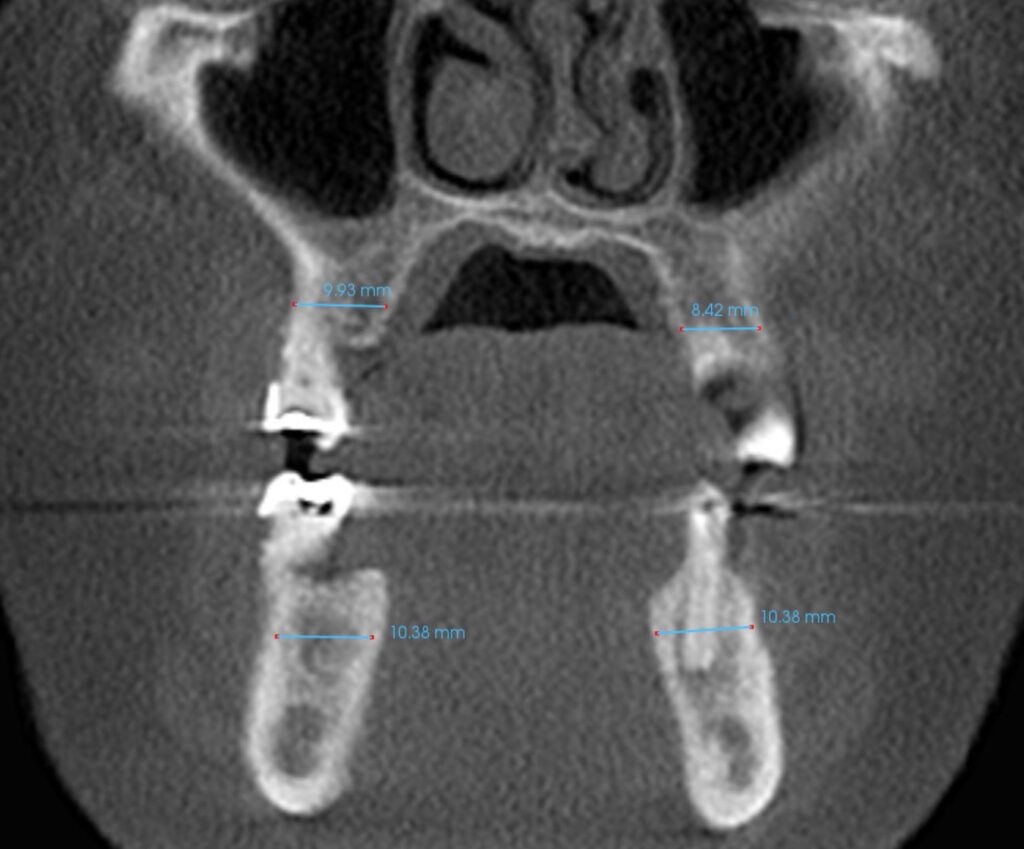
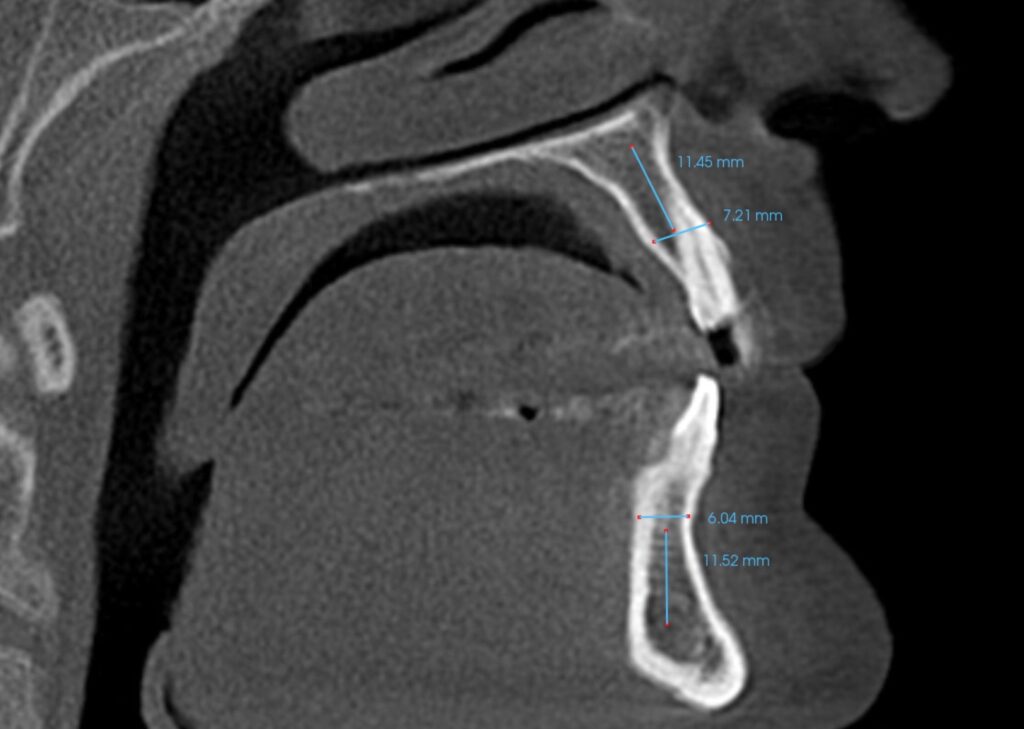
- Scroll through the Sagittal View (Time Allotted: 45 seconds)
- Focus on the anterior maxilla and mandible. Measure both the height and width in your lateral incisor proposed implant positions.
- This will provide your implant length and width size for the anterior sites.
- Assess Pterygomaxillary pillar location/size for pterygoid implant placement.
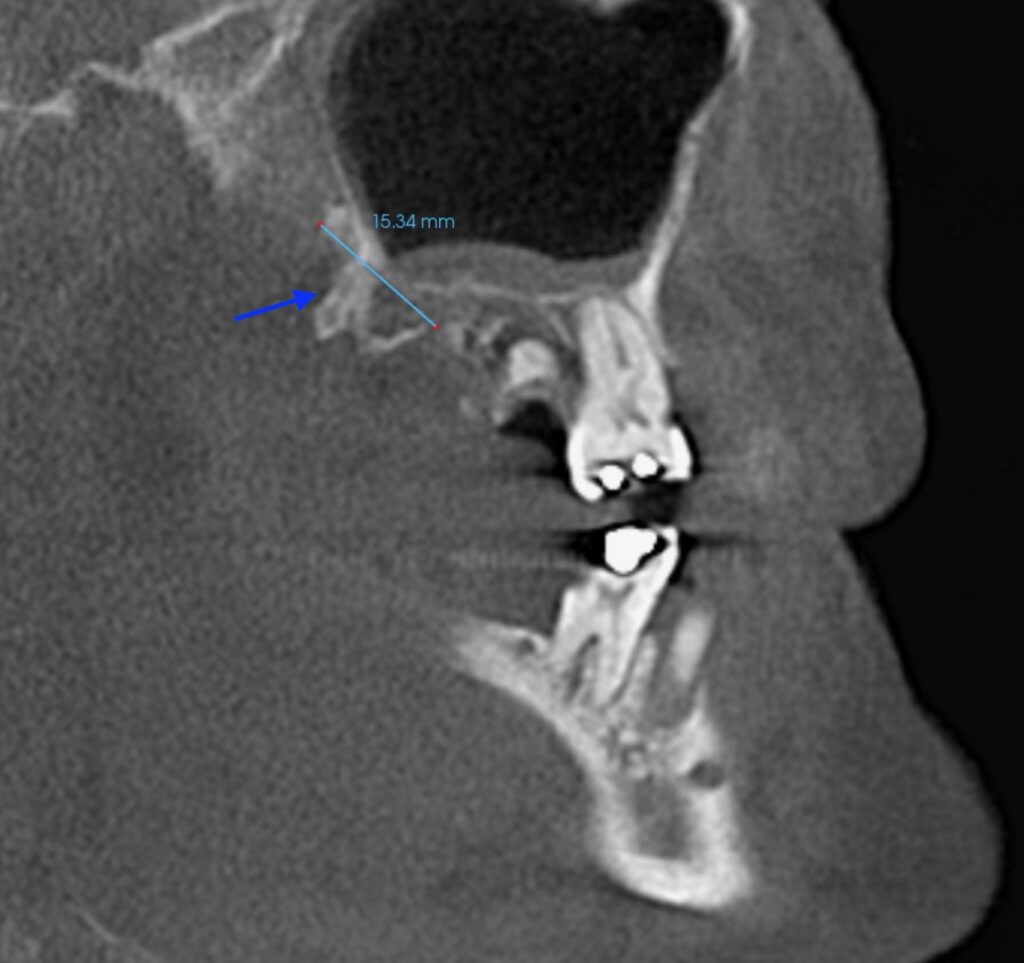
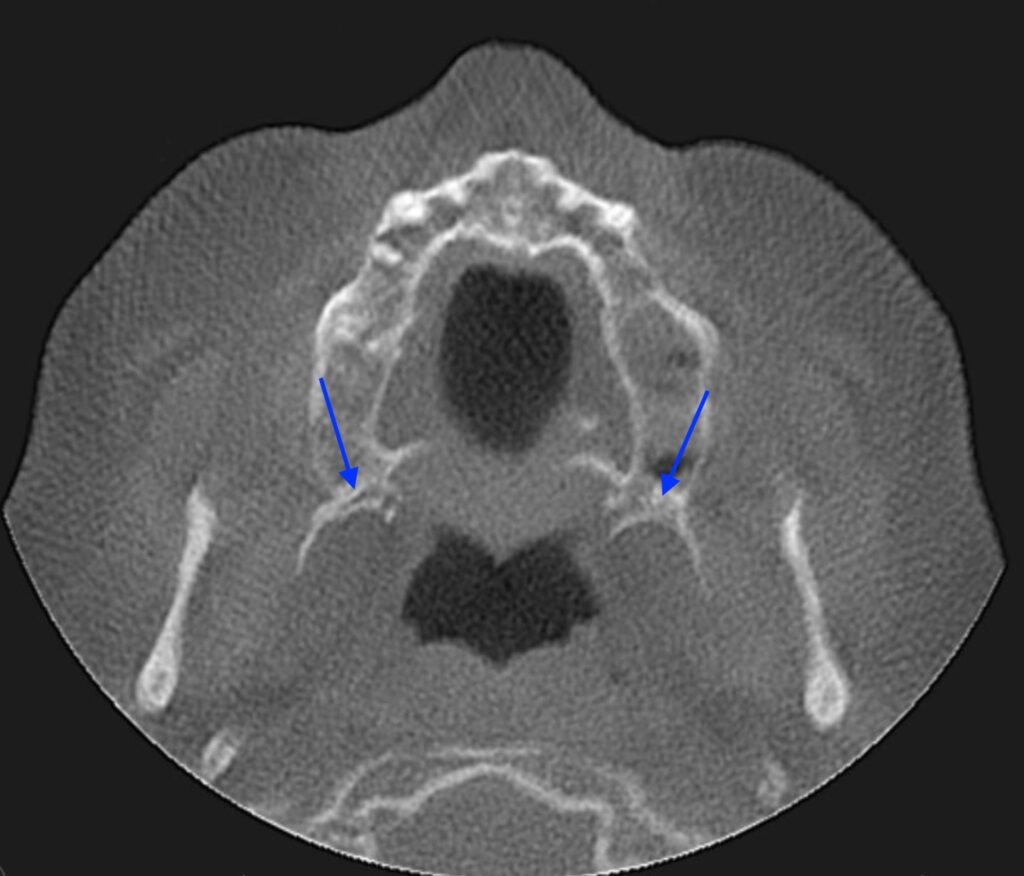
- View Axial CT image (Time Allotted: 15 Seconds)
- Assess Pterygomaxillary pillar location/size for pterygoid implant placement.
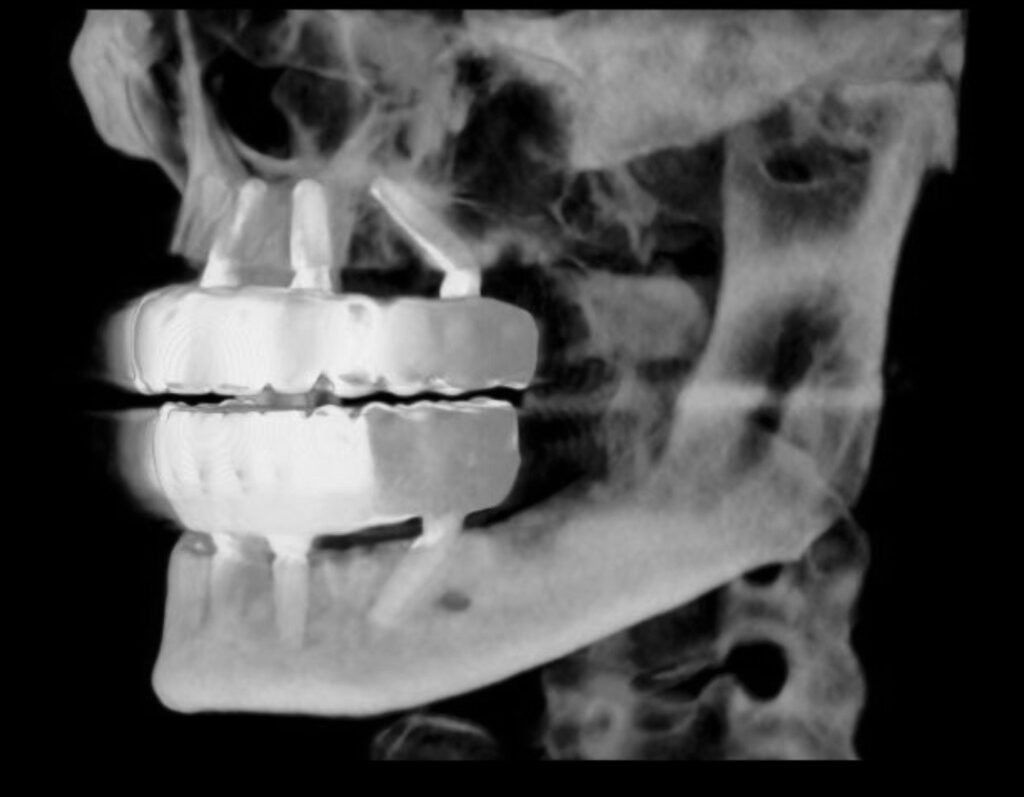
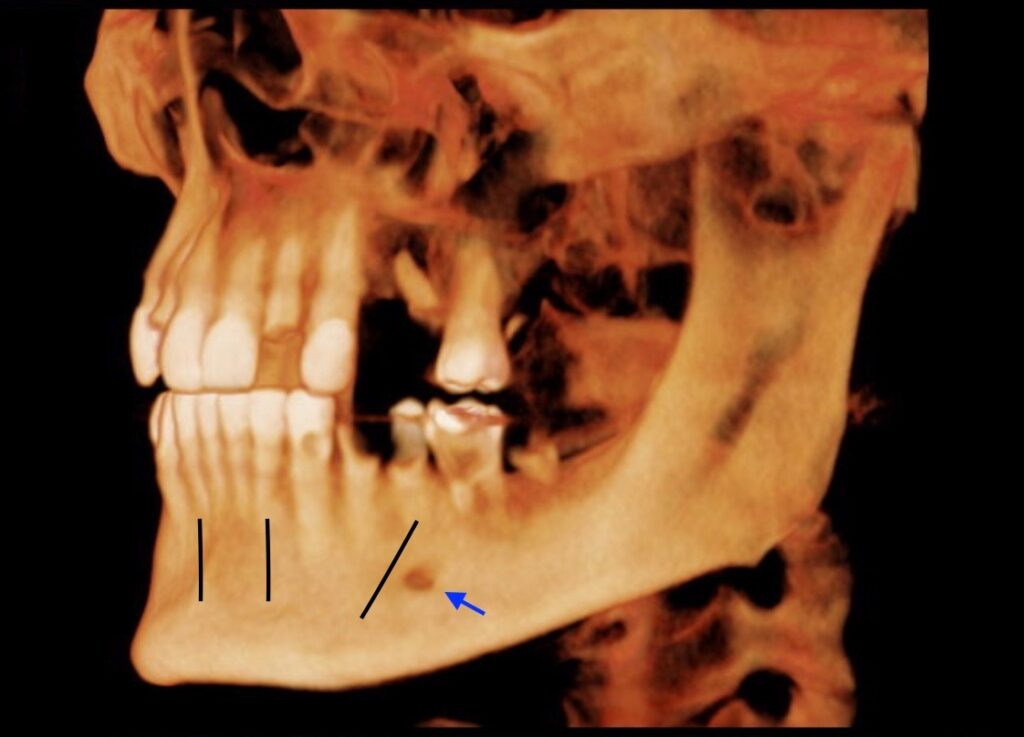
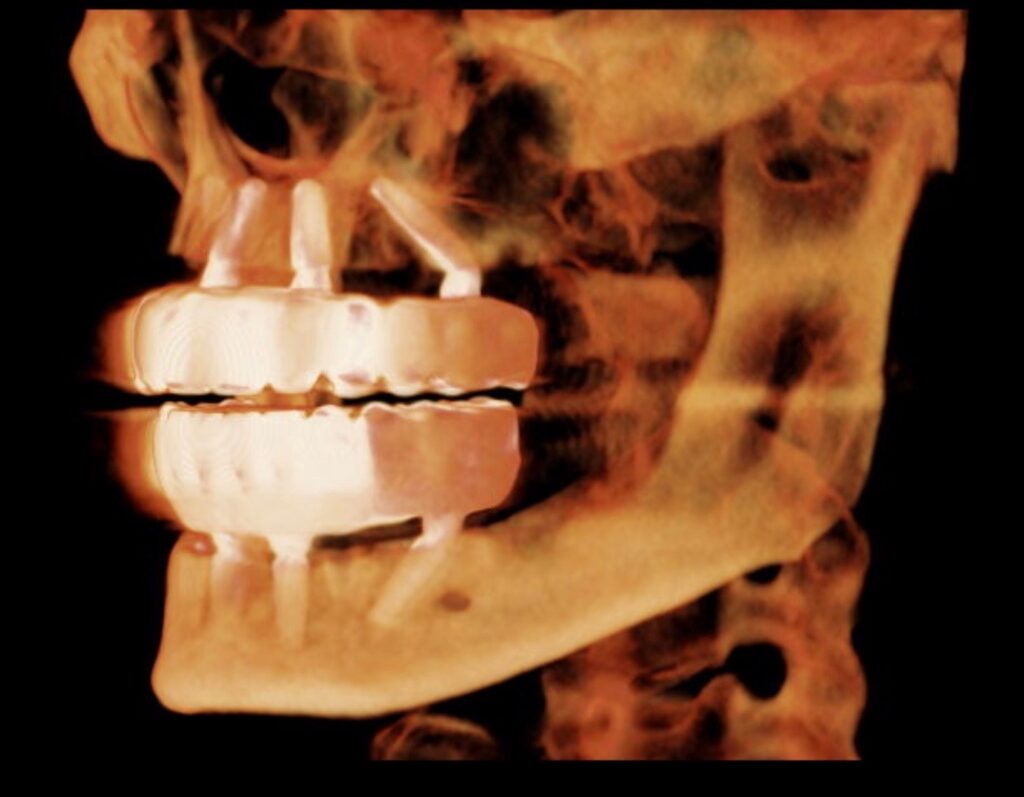
- View the 3D reconstruction image (Time Allotted: 15 seconds)
- This is the best image to assess the mental foramen.
- This view will give you a very realistic idea of how far posterior your mandibular implant will be in relation to the anatomic position of the mental foramen (this can vary from distal canine to almost first molar).
Total Time: 2 Minutes
In just 2 minutes you have accurately planned your AOX case – both maxilla and mandible.
You have selected length and width sizes for 4 traditional implants in both arches. This protocol also inherently plans for Pterygoid implant placement should you need it.
- Note that through intra-operative direct visualization and palpation of osteotomy sites with a perio probe, these measurements are confirmed and/or occasionally adjusted as indicated.
I use this protocol for every single case that I perform.
A CT planning protocol that’s – Accurate, Efficient, and Flexible.
With all this extra time, you might just find a new hobby.
Matt Krieger DMD
P. S. Shown is only the surgical treatment planning. The prosthetic work up would require additional time (ie, bite, lip position, VDO, reduction required etc). This information is provided to me by the referring restorative provider.
Pingback: Arch Goals: A Master Guide to Your First 1000 Arches - AOX Surgery
This is nice and concise, I have spent way too much time positioning and repositioning implants again and again. I’m using this on my next case.
Awesome! Hope it helps!
Thanks!
Hi Matt – great information here. I just found your site and look forward to browsing through it!
One thing that comes to mind from this article. I also plan a case like this in about 2 minutes, but I have been burned before by just placing the implants where they looked “about right”. Due to this, the first thing I do now is to draw a line across the proposed occlusal plane in the maxilla (as specified by the restoring provider) and then another line parallel to it about 15 mm above it. This is essentially planning my maxillary reduction. The mandibular reduction is less of a concern in my experience, so I mostly just do this with the maxilla. The remaining maxillary bone is where I can now place implants. This step takes about 10 seconds, so its just as fast. This immediately tells me a lot of info. It tells me now long of implants I can expect place, how much AP spread I have to work with, where the neck of the implants will be relative to the remaining tooth sockets, if I expect to be lifting the Schneiderian membrane, if the prosthetic will have to be thin in the posterior, etc. This basic information can then help guide my discussion / education with the patient and the restoring provider. Just a quick tip that has helped me a lot!
Hey Dr Noblitt! Great tip! Thanks for sharing!