
Inadequate alveolar reduction is one of the worst, but most avoidable, All-On-X complications.
Insufficient reduction of the alveolar ridge can lead to a thin prosthesis prone to fracture, having to unnecessarily open VDO, lip incompetence, and the dreaded visible transition line of the prosthesis.
The first step in preventing the above complications is that the surgical provider should always have planned reduction numbers prior to surgery for the both the maxilla and mandible.
This is part of a sound treatment planning process and accounts for things such as a high smile line, patient anatomy, and the type of final prosthetic planned.
Once those reduction numbers are treatment planned, there are a handful of options on how to confirm you have actually reduced enough alveolar bone to equal the planned and desired prosthetic reduction.
Having tried many of these options, I will share with you the choice I feel is the clear winner.
This is the method I use to check my reduction…every…single…case.
Let’s start at the beginning.
I have the fortunate scenario of being able to work alongside a prosthodontist for each and every surgery.
Preoperatively they will complete a treatment plan that assesses many prosthetic factors both clinically and radiographically to determine the required alveolar reduction for optimal prosthetic space, esthetics, function, and patient satisfaction.
Below is an example of the bone reduction information I prefer in my pre-op document. You can complete something similar yourself or request it from your referring provider.
Note that this is not the only treatment planning information I request before surgery. This is simply highlighting how I prefer the bone reduction requirements to be recorded.
Planned Bone Reduction Requirements:
Site #4: Incisal Edge 15 mm / Bone 4 mm
Site #8/9: Incisal Edge 16 mm / Bone 5 mm
Site #13: Incisal Edge 15 mm / Bone 4 mm
Site #20: Incisal Edge 15 mm / Bone 4 mm
Site #24/25: Incisal Edge 17 mm / Bone 6 mm
Site #29: Incisal Edge 15 mm / Bone 4 mm
This provides a reduction number for both dentate and edentulous sites. I am able to reference the amount of reduction required when measured from either the incisal edge of an existing tooth or from the alveolar crest at an edentulous site.
I prefer both measurements, even in a dentate area. In the event an existing tooth fractures during removal I can still utilize the bone measurement as a reference.
Now let’s get to the surgical aspect.
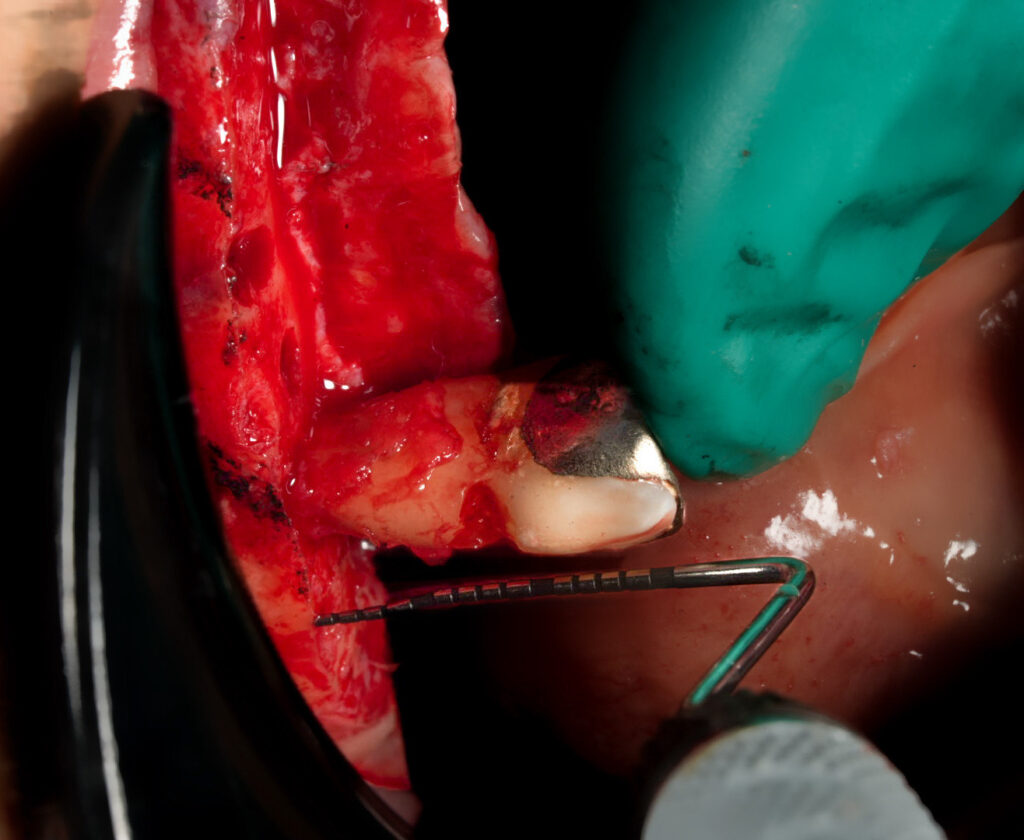
I remove all the teeth in the arch before I reflect a flap. I have indicated why (and why I think you should too) in an upcoming article: Why I Take Teeth Out First…And Make Incision Second.
After I complete the extractions, I set aside and save the teeth that were referenced for measurements.
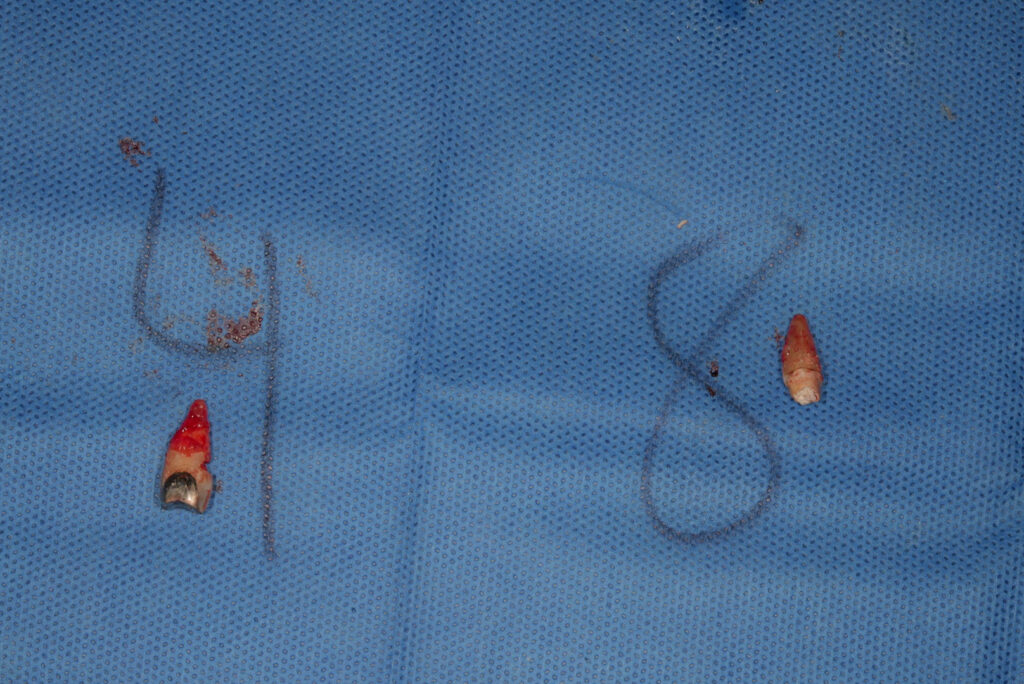
If there isn’t a tooth at that site you can either use the adjacent tooth and/or focus on the alveolar bone measurement at that site.
At this point, I reflect my flap.
After my flap is reflected, I take the teeth I set aside and replace them in their sockets.
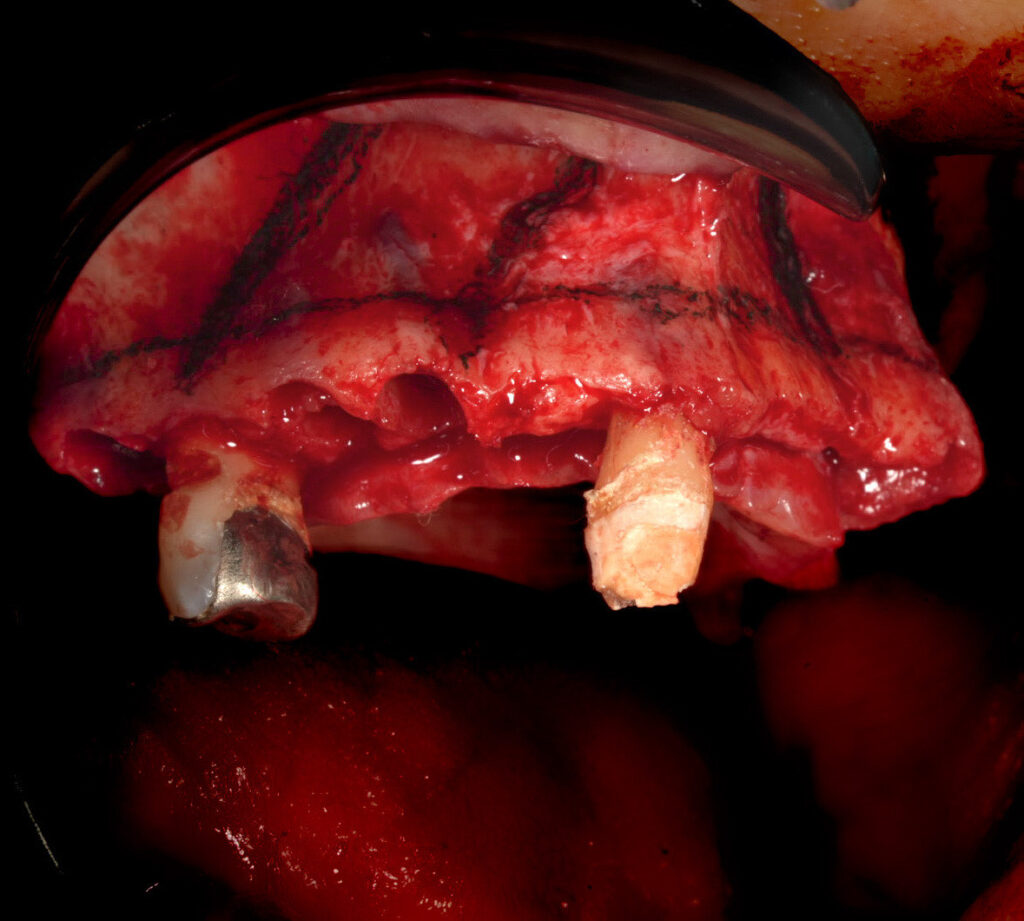
I then utilize a sterilized #2 pencil and a periodontal probe to mark the desired reduction length from the incisal edge of the replaced teeth, onto the alveolar bone.
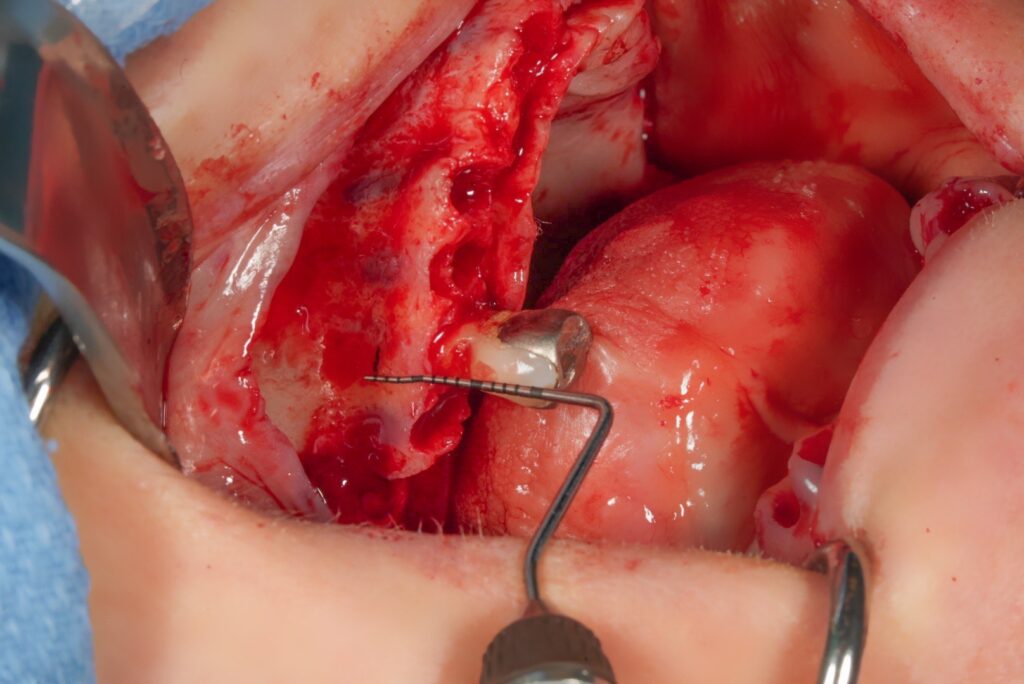
I then “connect the dots” to create a line across the alveolus.
Sometimes I may take a little more bone in areas to ensure the new bony shelf is level and flat, regardless of what the pre-op measurements indicated.
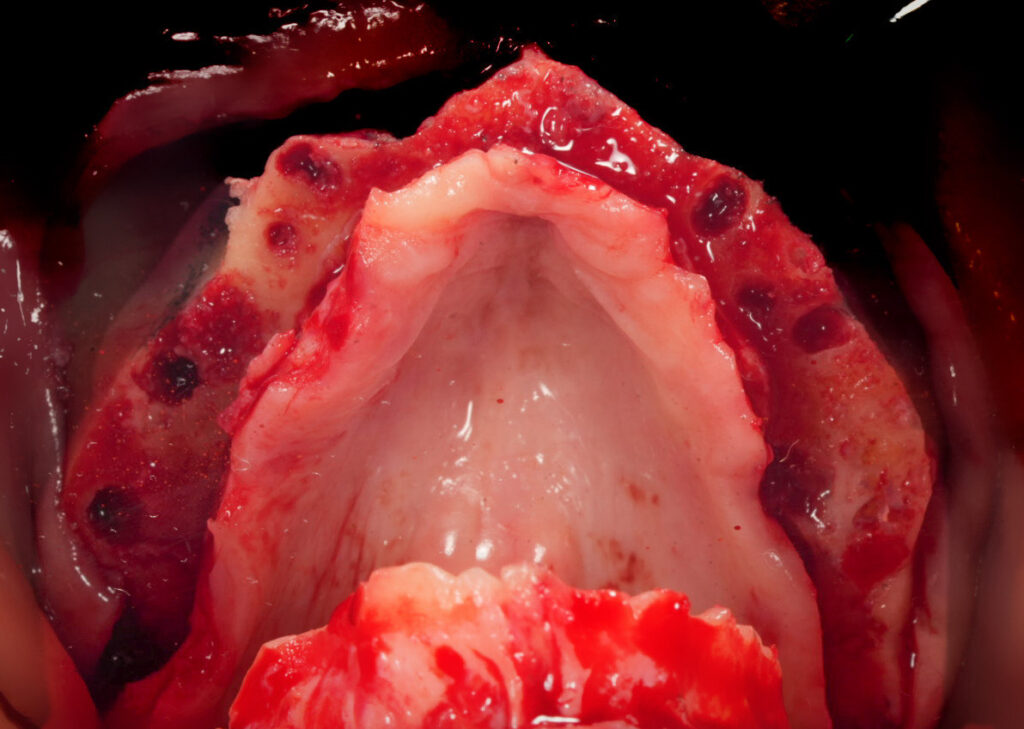
The alveolar reduction is then completed.
Now here is where the real magic happens…
The benefit to saving and utilizing the extracted teeth is that after reduction you can place the teeth back again for both you and your restorative provider to visualize and confirm adequate reduction!
Voila! Everyone is on the same page both surgically and restoratively! All providers involved can directly visualize adequate reduction with confidence.
All this precision, confirmation and teamwork by simply using what the patient has already provided for you.
It really doesn’t get more accurate than this. And all these benefits come without any guesswork, doubt, or an expensive, clunky guide that has to be pinned in place.
P.S.
Please note that VDO is also checked to confirm adequate reduction. However, only checking VDO, specifically in a double arch case, can be misleading as an over-reduced arch can compensate for an under-reduced arch. VDO alone, also does not give the surgeon any intra-operative surgical guidance.
P.P.S.
Thank you Dr. Albert Park (Prosthodontist – Dallas, Texas) for teaching me this method over some questionable hotel lobby french fries.
Matthew Krieger DMD
Pingback: How to Ensure Adequate Mandibular Reduction Without a Guide - AOX Surgery
Pingback: My AOX Setup: What Instruments I Use & Why - AOX Surgery
Pingback: Difficulty Achieving Primary Closure… What Do I DO Now?!? - AOX Surgery
Pingback: Abutment Placement: A Strategic Sequence - AOX Surgery
Awesome write up. Regarding the pencil, is there a specific pencil you use and do you have to worry about leaving the markings on the bone – do you wipe them off before closing up?
Thank you!
I use a regular pencil that is sterilized and is SINGLE use only. You want to avoid using any pencils that “flake off” from the body as this can get in the wound. The markings are removable if you feel this is necessary or indicated. This technique does not seem to cause any issue for the patient, regardless of if they are or are not wiped off. I should note that I did not develop this technique. There are many, many surgeons in the full arch space (and OMFS/Plastics space) that use this technique and have done so for years and none that I am aware of (or that I have learned from) have ever reported an issue with the graphite markings from a healing standpoint. I have also never noted any foreign body reaction or infection attributed to the graphite markings in my own cases.
*As always this is simply my anecdotal opinion based on my experience, also shaped by those who I have learned from.
*That being said there are reports and validation in the literature of this technique. Here are a couple of examples:
1. Use of a bone pencil in maxillofacial surgery. Frazee, Troy A et al. Journal of Oral and Maxillofacial Surgery, Volume 56, Issue 1, 101 – 102
2. Innovative Use of Graphite Pencil in Cranioplasty. Bharathi Mohan P, Chittoria RK, Gupta S, Aggarwal A, Reddy CL, Shijina K, Pathan I. World J Plast Surg. 2020 Jan;9(1):104-105.