
Most practitioners who routinely perform All-On-X surgery have some preference toward a certain implant size. Sure, depending on the case, we adjust as necessary. But there tends to be a certain implant we prefer most of the time.
In discussing this topic with experienced providers, who cumulatively have done thousands and thousands of arches, the “optimal go-to” implant size has varied in opinion from a diameter of 3.5 mm to 4.3 mm and a length of 11.5 mm to 16 mm.
Those are fairly significant differences in size. However, to each of those experienced providers, they feel their selected size to most often be the best choice in their hands.
While there are basic guiding principles regarding implant size, surface area, bone to implant contact, initial stability, and osseointegration – most of the AOX implant size selection is anecdotal to each provider.
That being said, most practitioners will agree based on the above principles that a 4×16 mm implant has significant advantages over a 3.5×8 mm implant for immediately loaded, fixed arch surgery.
It is understood that the size, and therefore the surface area of the implant in contact with bone, can and does have an effect on torque, initially implant and prosthetic stability, and therefore osseointegration.
However, there is a gray area if you will…where things become a little murky.
With today’s superior implant technology and design, does a 4×16 mm implant truly hold a statistically significant advantage over a 4×13 mm implant in the setting of AOX surgery and cross arch stabilization? Hard to say…
So the question arises…How should we select our implant size for AOX surgery and furthermore, which size is the optimal implant size for AOX surgery?
Should we use a 3.5×13 mm… a 4×11.5 mm… a 4.3×13 mm… or a 5×16 mm implant for that matter?
Should we always place the longest and widest implant size in the available bone to maximize bone to implant contact?
Or should we place the smallest implant that we are able to generate adequate torque with to ensure a surplus of native bone around the implant?
Are there other factors we should consider?
In order to answer these questions from an evidence based approach, it is clear that a large scale, controlled study would be required. This is also difficult with AOX surgery given differing practitioner skill, treatment philosophy, and patient selection in order to control just for the implant size.
Unfortunately, I do not have the means to complete a study like this at this time. Nor am I aware of one that exists. Although, I would be highly interested in the outcome of this research!
What I can tell you however, is what implant size I feel is most optimal in my hands and…most importantly – WHY.
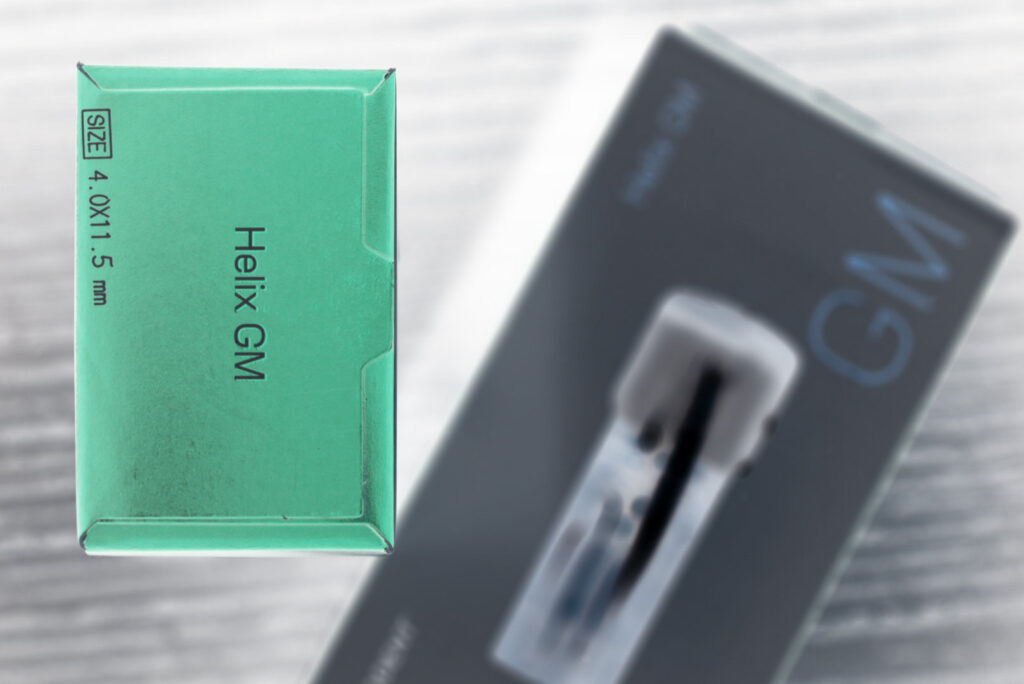
Anterior: 4×11.5 mm Neodent Helix
Posterior: 4×13 mm Neodent Helix
I have spent many hours thinking about this topic and trying out different implant sizes in the setting of AOX surgery. Furthermore, I have specific, important clinical reasons and surgical rational as to why I feel the implant sizes I routinely use are most often the best choice.
Many of you may glean significant insight from this post and possibly even change how you do things. Others, may already select their implant sizes in a similar fashion and may gain confidence in knowing they are not alone. And yet others may completely and utterly disagree with this post.
And all of those things area ok…but what I want you to take away from this article is knowing what implant size is most often optimal for YOU and YOUR patients in YOUR hands. And more importantly… WHY.
You need to understand WHY you use what you use.
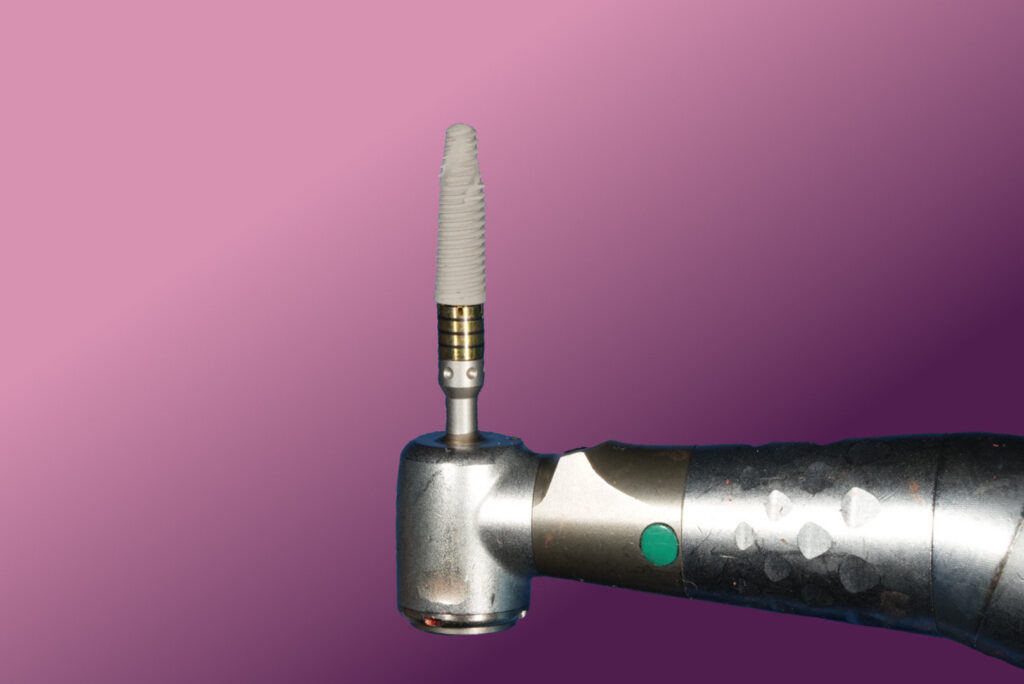
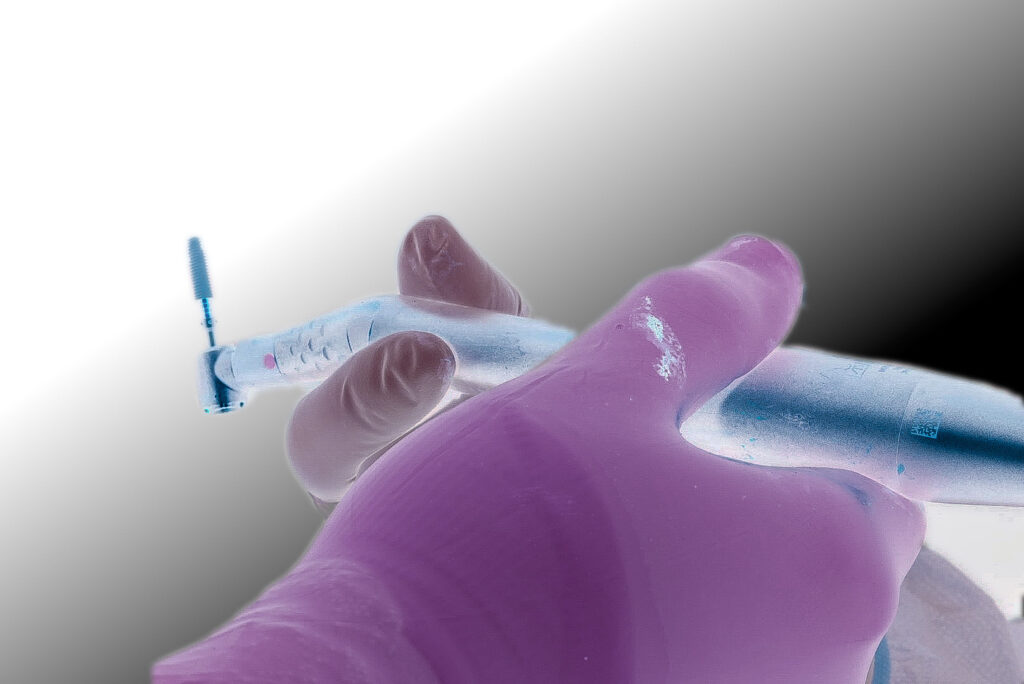
Before I dive into how and why I select my implant sizes for AOX surgery I want to indicate that the implant system I use is Neodent.
Within this system, I almost exclusively use the Helix implant. This article and the mentioned sizes will relate to that implant.
If you do not use that implant, that’s fine. Just keep in mind that your implant size offerings may differ slightly.
Again…the goal isn’t to have you use the exact same implant as me. The goal is for you to understand how to select the best implant for YOUR AOX surgery and to know WHY you feel that implant is best in YOUR hands.
The Optimal AOX Implant Sizes… In My Hands:
Posterior Maxilla and Mandible:
- 4.0 x 13 mm Neodent Helix

Anterior Maxilla and Mandible:
- 4.0 x 11.5 mm Neodent Helix
No… I do not use these implants in every single case. However, I utilize these implant sizes as shown in ~ 2 out of 3 cases. They are by far my go-to sizes and have provided me much success with immediately loaded AOX cases.
The other 1/3 of my cases are a mixture of smaller, thinner, wider, or longer implants based on anatomy, density, composite torque etc.
Before addressing the clinical rationale for the selected implant sizes, let’s first discuss:
Why Have a Go-To Size at All?
If you don’t have an “optimal, go-to” implant size – you’re missing out on a couple of huge benefits.
1. Consistently utilizing the same implant size allows you a thorough understanding of that implant’s optimal osteotomy preparation, feel/tactile sensation in the bone, and ability to generate torque.
I have used the 4×11.5 mm and 4×13 mm Helix so much over the past few years that I can literally tell you after the “feel” of my starter drill how much I am going to prep, or under-prep my osteotomy and what I anticipate my torque being – before I ever place my implant.
This comfort and experience with the implant helps provide optimal results in less than optimal anatomic scenarios. This understanding of my implant, the dimensions, and the tactile sensation ensures I am able to maximize its success.
Achieving this level of familiarity with the ins and outs of your AOX implants is much more difficult if you change them every case and are constantly using different sizes and/or different implant brands.
2. Improved Efficiency.
Utilizing similar implant sizes consistently, allows your team to anticipate your needs.
My team knows where my 4×11.5 mm and 4×13 mm implants go without me even having to tell them.
Your team is able to have implants ready for you and handed to you in the proper order, because you do it in a similar fashion each time. This can shave significant surgical time off of a case.
Now let’s take a look at WHY I feel these implant sizes are optimal.
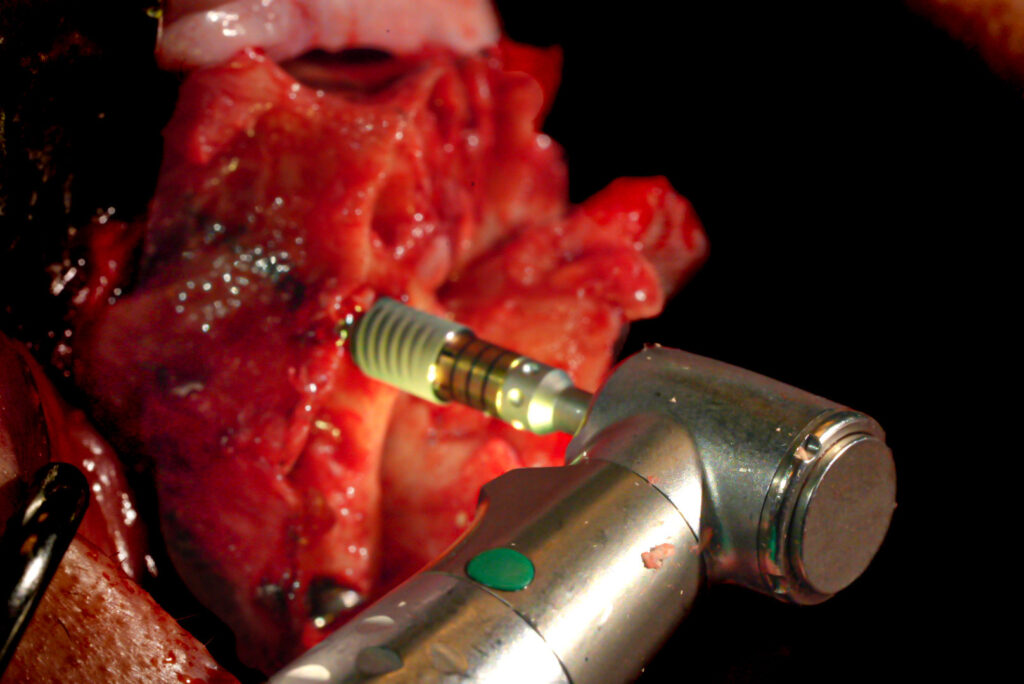
4.0×13 mm
My optimal implant size for “routine” cases in the posterior maxilla and mandible is a Neodent Helix 4×13 mm implant. Keep in mind this implant is usually placed at a 30 degree angle.
The clinical rationale for the 4×13 mm implant:
The 13 mm length is long enough to consistently generate loadable torque, even in the lower density bone of the posterior maxilla.
With the reduction required for my cases (Prosthetic space for a titanium bar overlaid with Zirconia) I feel that while the 13 mm implant length is advantageous for torque, it almost always avoids penetration of the lateral nasal wall and/or inferior border of the mandible. A longer implant, such as a 4x 16 mm, in some cases, would violate these structures.
The 4.0 mm width is my workhorse as it is wide enough to also generate consistent torque, but not so wide that it encroaches on the buccal plate in most patients.
The Neodent system is also tailor-made to generate torque with the 4.0 mm diameter implant. Why? The 3.5 mm drill under-prepares the osteotomy by 0.5 mm. Since the Helix has a notably tapered end, the 4.0 mm implant is able to engage the 3.5mm osteotomy without spinning out – but allowing for increased torque as it advances.
Under-prepping less than this doesn’t always generate significant torque. Under-prepping more than this (depending on bone density) can lead to an implant spinning out.
This is why I love the 4.0 mm diameter…It’s dimension relative to the osteotomy drills is perfectly designed to improve torque with minimal risk of spinning out.
In the maxilla I almost always stop my osteotomy prep at the 3.5 mm drill and then go straight to the 4.0 mm implant.
In the mandible I typically prep half of my posterior osteotomy with the 4.0 mm drill as the bone here is usually denser than the posterior maxilla.
4.0×11.5 mm
My optimal implant size for routine cases in the anterior maxilla and mandible is a Neodent Helix 4×11.5 mm implant.
The clinical rationale for the 4×11.5 mm implant:
The 11.5 mm length is long enough to consistently generate loadable torque (bone density will be better in the anterior sites) without violating the floor of nose or inferior border of the mandible.
The 4.0 mm width is usually adequate for the average patient without impinging on the maxillary buccal plate concavity.
The 3.5 mm drill is used to under-prepare the maxillary anterior osteotomies to generate torque (normally no 4.0 drill is used). I am typically able to achieve a torque of 45-60 N-cm with the 4×11.5 mm implant in the anterior maxillary sites.
Under-preparation is almost never necessary in the anterior mandibular sites due to increased bone density and increased cortical bone volume.
The goal with my implant size selections is to generate the highest amount of torque and bone to implant contact – without violating adjacent anatomic structures.
I feel that the 4×11.5 mm and 4×13 mm implant sizes accomplish the goal of consistently high, immediately loadable composite torque values. They also limit the chance of post-operative complications that could occur with a longer implant, such as osteomyelitis due to violation of the inferior border of the mandible or intra-nasal infections from extension into the bony nasal housing.
Given this criteria, the 4.0×11.5 mm and 4.0×13.0 mm Neodent Helix implants are my go-to, workhorse implants for AOX surgery.
Now it’s time to choose YOUR workhorses. Just remember to know WHY you use what you use.
Here’s to excellence in simplicity.
Matthew Krieger DMD
P.S.
Future articles will discuss advanced treatment concepts that will include when and why I will veer from these implant sizes based on case complexity, patient anatomy, and severe atrophy etc.
Pingback: Arch Goals: A Master Guide to Your First 1000 Arches - AOX Surgery
When I am planning cases I seem to usually only have space for 3.5 in the anterior mandible. Are you doing anything “special” in these regions or any area that tends to be wide enough for 4.0?
Do you have any videos of your surgeries posted anywhere?
Hi Shaun,
1. I do not have videos at this time. I will be releasing an online course, hopefully mid-year, that will include more “video content”.
2. I very rarely use a 3.5mm implant in the anterior mandible. There are always exceptions in significantly atrophic mandibles. However the mandible typically widens out as you move apically, so after reduction, you almost always have more “width” than you originally did at the crest. I almost always place a 4.0mm width in this region, occasionally a 3.75mm. For reference, I am almost always reducing to the very bottom of the central incisor sockets. When my reduction is completed I typically can no longer see the mandibular central incisor sockets and can see only 1-2mm of the lateral incisor sockets. Following this reduction, the alveolar crest is typically wider than it originally was, prior to reduction.
Is there a maximum amount of torque that you don’t want to go over? Each case is different whether your doing AOX on a ridge where you have removed the cortical portion of the crest of the ridge for prosthetic space or if your placing an AOX on a D1 edentulous case with no reduction needed. I’m curious if you try to avoid high torque on dense cortical bone (due to low vascularization) at the crest by placing sub crestal or over prepping (osteotomy) at the crest if placing implant at the crest?
I’ve recently seen bone loss on single unit implant cases where I go to uncovery (2nd stage) and see a small fistula at crest. I uncover and there purulence with bone loss. This was for larger diameter implant case and possibly there was a pin point exposure in the soft tissue during healing that increased over time causing chronic inflammation/infection. This was a 5.5 dia implant that was 1 mm subcrestal and high torque in a D1/D2 case (#30). Due to the nature of the large dia implant there is no blood supply to the soft tissue above this implant which increases the likelihood of soft tissue defect, I’m assuming?? Probably should have placed healing abut at time of implant placement. Just want to get your opinion on this. Thanks again for your blog. This has been very enjoyable to read and learn.
Hi Austin – Below are some brief responses to your questions (these could be in depth very long answers – I will try to address some of these topics in more detail in future articles).
1. I believe the maximum “recommended torque” for the implant system I use is 60 N-cm. That being said I have placed many implants at higher torques than this and have never had an issue that indicated any increase in failure that was statistically significant (I have fractured a torque wrench driver in an implant however, from generating too high of a torque). I believe the higher the torque (most of the time) – the better. This can obviously be taken to detrimental extremes – manufacturers set a recommended torque limit because a torque too high can fracture the implant or implant components and/or deform the internal surface of the implant and prevent abutments from seating properly etc. But as far as “pressure necrosis” – while I know this is a real thing from a research standpoint – I have yet to see it be any notable issue clinically with the implant system I use. Please note that I’m also not “trying” to get torques significantly above 60 N-cm.
2. If you haven’t read it already – here’s an entire article that discusses my “target torque values” and why:
https://aoxsurgery.com/what-is-the-target-torque-value-for-my-implants/
3. I don’t necessarily try to avoid high torques on dense cortical bone. These torques are typically higher (assuming a jaw that is not atrophic). ***However, often times cases with only cortical bone, as you have referenced above, are atrophic cases. That’s why they don’t have cancellous bone – they are so atrophic there is no medullary bone space or very little. So in atrophic cases – especially those with dense cortical bone – I will ***avoid excessive torque (or even high torque) on purpose so as not to fracture the atrophic jaw. In these atrophic cases I typically shoot for a torque of ~30 N-cm but it is case dependent. Generating high torque in an atrophic case can result in jaw fracture. This can occur regardless of the bone density. However, in a an atrophic cortical case it is deceptively easy to generate high torque – but also dangerous to do so. That is my bigger concern – not so much implant failure due to pressure necrosis – but rather jaw fracture.
4. I place my implants at a crestal level. I am not a “subcrestal” guy. That being said – since most of my implants are angled one side of the implant will be flush (or near flush – maybe ever so slightly subcrestal) and one side will actually be 1-2mm subcrestal because the implant itself is angled so the two sides of the implant platform are not at the same height. With the implant system I currently use I don’t see any routine crestal bone loss and therefore do not feel the need for “subcrestal” placement (there are a few other reasons I don’t do this as well that I have planned to address in an upcoming article).
As far as your single implant case question – if you had purulence – you had an infection. An infection will lead to bone loss. I cannot tell you how/why you had an infection but I would suggest the more likely source of your crestal bone loss was the presence of infection and not the “wide implant”. I cannot envision a scenario where a wide implant would necessarily inhibit soft tissue blood flow – and this would not be a concern to me. I place wide implants often and do not have any notable issue with soft tissue closure or blood flow. If your soft tissue is intact it will have blood flow from its base despite the incision.
Thank you for your response! Very helpful!