
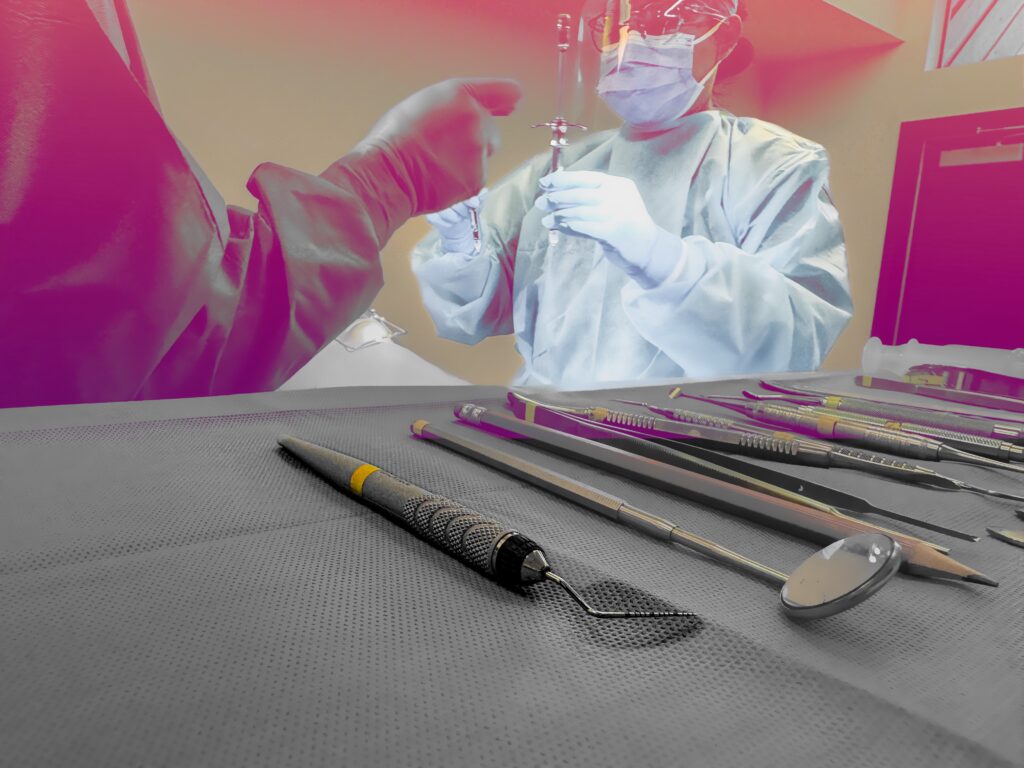
The periodontal probe is not the surgical instrument most commonly associated with All-On-X Surgery. In fact, I’m not even sure you can classify it as a “surgical instrument”.
I avoided the perio probe for years as a means of preventing traumatic flashbacks to three hour SRP appointments in dental school. In fact, until I started performing full-time AOX surgery, I didn’t even have this instrument on my surgical tray.
Oh how times have changed.
As an AOX focused surgeon, the perio probe is now one of my most frequently used surgical tools and I literally cannot operate without it.
This often overlooked instrument is a highly versatile, invaluable intra-operative tool.
Let’s take a look below at the 5 ways in which I utilize the periodontal probe to improve AOX surgical outcomes.
5 Ways I Use a Perio Probe During AOX Surgery
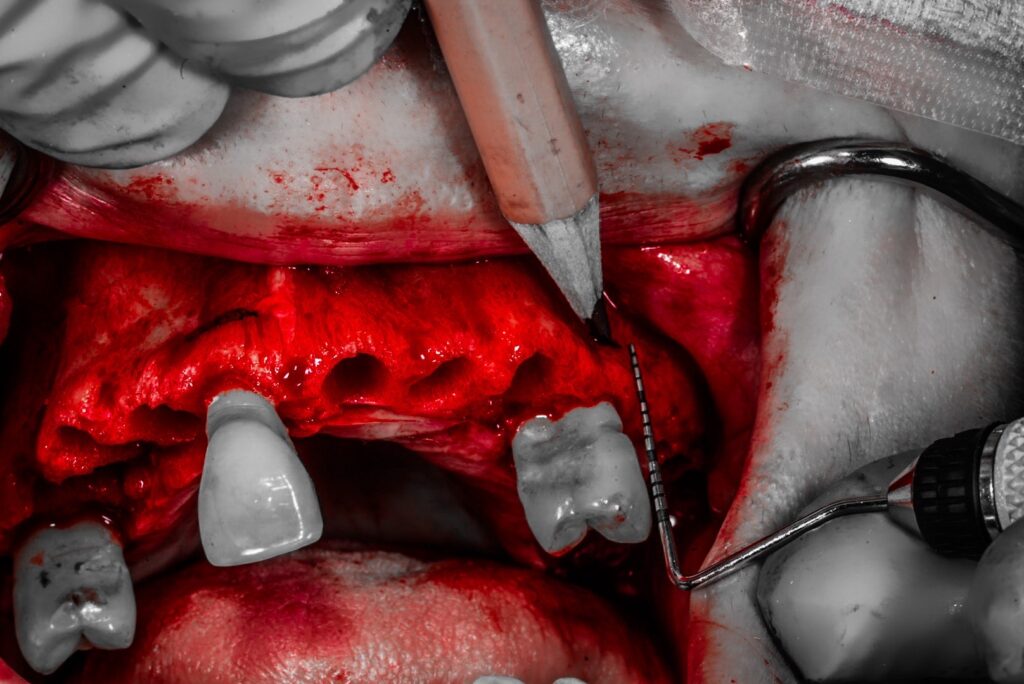
1. The perio probe is used intra-operatively to measure and mark my planned alveolar reduction.
During removal of the patient’s dentition, pre-selected teeth identified as reference points are saved and set aside. After incision and flap reflection, the selected teeth are then replaced in their socket and the planned alveolar reduction (normally 15-18mm) is marked from the incisal edge of the teeth onto the alveolus with a sterile graphite device.
The periodontal probe, is used to confirm the measurement from the incisal edge to the alveolus. The probe is readily available, easy to use, and accurate.
While popular to do… There is really no reason to complicate this portion of the procedure. It simply does not get more accurate than this.
For a detailed explanation of this technique please read, “The Best Way to Confirm Your Alveolar Reduction is On Point”.
2. The perio probe is laid on its side in a horizontal fashion, in order to measure anterior-posterior distances.
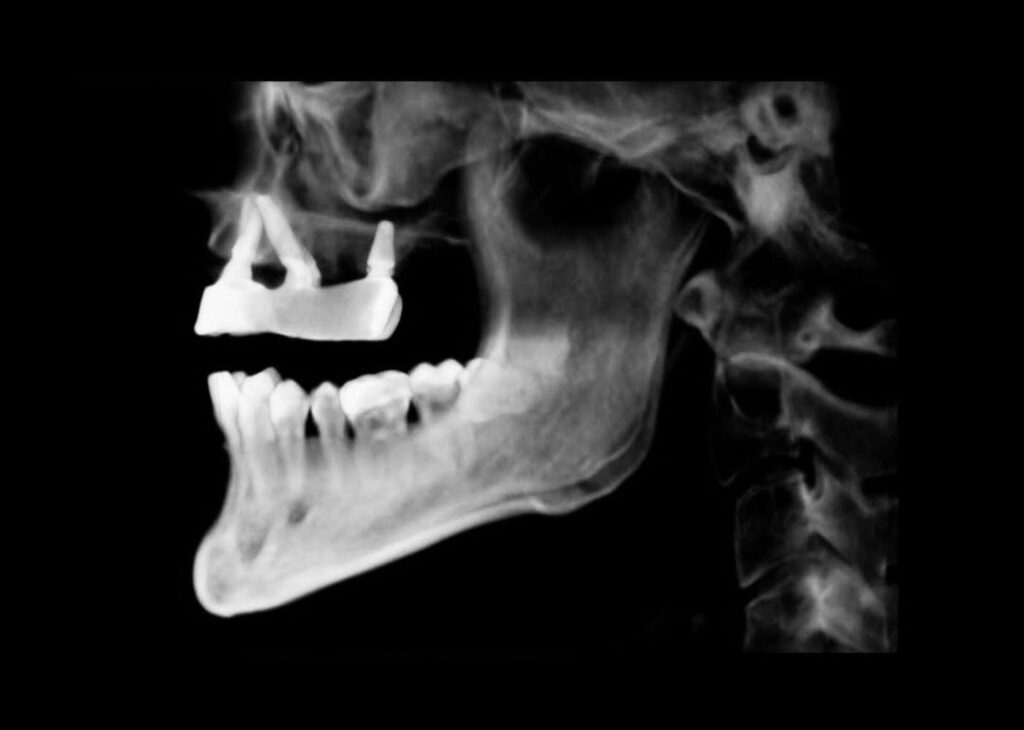
Identifying accurate osteotomy sites on edentulous patients and/or in large edentulous portions of the jaw, can at times be tricky. These patients may not present with easily identifiable anatomic landmarks, such as a socket, to help guide implant site selection.
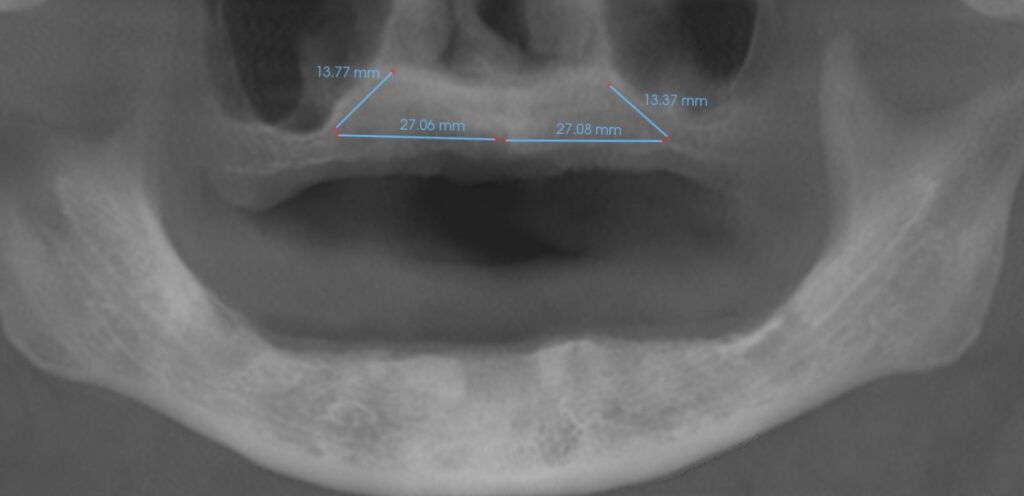
In a completely edentulous patient, I utilize CT Scan software to measure on the panorex from the midline nasal spine to the the desired posterior implant position, just anterior to the sinus. This is usually somewhere between 20-30 mm depending on the level of atrophy.
Intra-operatively, the periodontal probe is laid on its side with one edge at the midline nasal spine. A sterile graphite mark is then created at the other tip of the periodontal probe facing distally. I know that this distance is 20 mm (the length of the perio probe). If the original distance on the panorex image was 27 mm, I then mark an additional 7 mm from this point.
I have now accurately marked a 27 mm distance from the midline to the planned posterior implant site, which corresponds with the original panorex image measurement. At this point, I will begin my osteotomy at the marked locations.
For a partially dentate patient that presents with a long span edentulous area in the posterior maxilla, I will perform a simple, but very similar technique to that discussed above. In these cases I will measure, on the panorex image, the distance from the last known tooth to the planned implant osteotomy site.
As an example, a patient may present with only teeth #’s 7-10 and #14. Without an anatomic reference on the right posterior maxilla, determining the exact position for implant #4 can be difficult. Not to mention, doing so while successfully avoiding the sinus, but also maximizing A-P spread.
In this scenario, attention is paid to the panorex image, and a measurement is taken from the distal aspect of tooth socket #7 and extended to the planned implant position. Let’s say this measurement is 15 mm.
Intra-operatively the periodontal probe is again laid on its side – this time with the tip of the probe at the distal aspect of socket #7. A sterile graphite device then marks the corresponding 15 mm point on the perio probe. I now have an accurate posterior implant position – identified a known distance, from a known reference point – that maximizes spread and avoids the sinus.
Finally, I prefer a perio probe that is 20 mm from the curved edge to the tip. This allows me to quickly lay the perio probe on it’s side and see how much distance is between implant sites. While I don’t worry about this much with a titanium bar prosthetic, when I was utilizing an acrylic temporary I would attempt to avoid scenarios where the distance between implants was significantly greater than 20 mm. I felt that a span notably longer than this led to a weak point in the temporary, prone to fracture.
3. After bone reduction, the perio probe is used to measure a mandibular root socket and/or a palatal root socket for implant placement.
I’m a huge fan of eliminating an excessive cantilever with either a palatal root implant on the maxilla and/or a short implant distal to the foramen on the mandible.
In both of these techniques, however, I am working close to and around significant anatomic structures. In the maxilla, care needs to be taken to avoid the maxillary sinus and perforation of the sinus membrane. In the mandible, attention needs to be paid to avoiding the inferior alveolar nerve.
I’m going to bet that you may have a guess as to the highly sophisticated equipment I use in these anatomical areas to help confirm implant placement… Yep – a perio probe.
A perio probe allows me to accurately measure the depth of a palatal root socket and/or a mandibular root socket, after reduction, and thus confirm intra-operatively exactly how much distance I have to the maxillary sinus floor and/or inferior alveolar nerve canal. While I always use the CT scan to reference pre-op measurements, those can and do change intra-operatively after removal of the dentition and reduction.
In addition, I utilize the perio probe in the absence of a mandibular socket to measure from the crest to the top of the mental foramen. This gives me another indication of how much posterior bone height I have available above the canal (Keep in mind that the canal will normally dip down from the height of the foramen as it travels posteriorly).
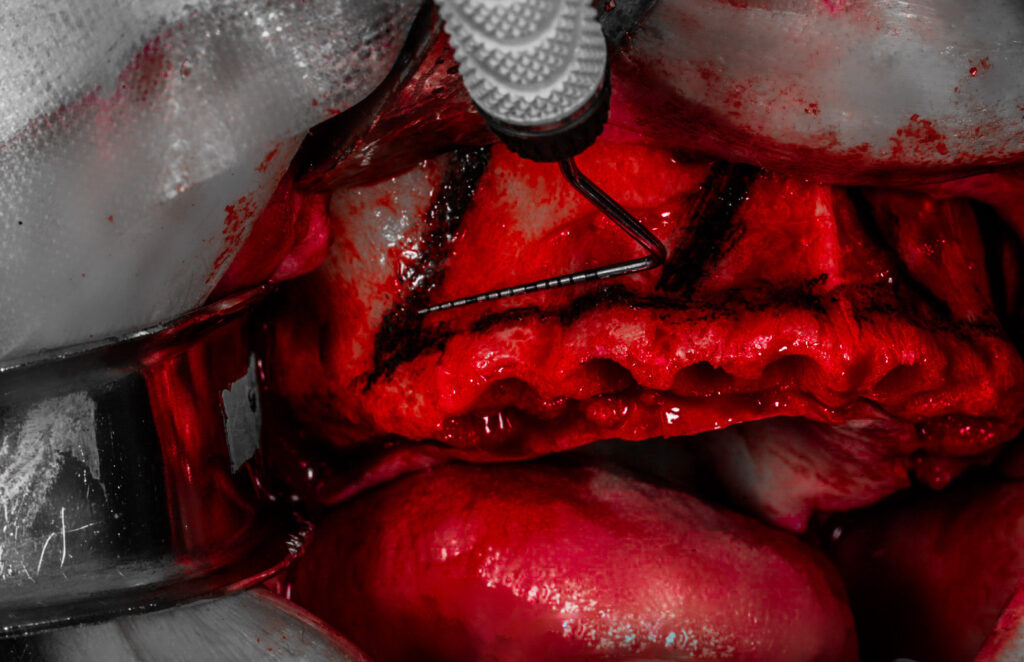
4. The perio probe is used for tactile confirmation of a bony stop after osteotomy preparation.
During osteotomy preparation, I use the perio probe after each drill to confirm the presence or absence of a bony stop. Based on the tactile feedback, I then proceed or adjust accordingly.
I do this on each and every implant site. This is especially valuable when working around anatomic structures such as the maxillary sinus, inferior alveolar nerve canal, nasal floor and lateral nasal wall etc.
There are times where select anatomic structures, such as the piriform rim, are strategically utilized for improved torque. However, the vast majority of the time I want to know and ensure that I have a true bony stop and have not violated these structures. The perio probe is an efficient and accurate way to confirm this intra-operatively.
5. The perio probe is used to verify that osteotomy walls are intact.
Finally, the periodontal probe is a great tool to confirm that the entirety of the osteotomy has intact surrounding bony walls.
While I do not utilize this technique on every osteotomy, there are two principle scenarios where I will employ this technique.
First, as we have all experienced, there are patients who present with significantly pneumatized sinuses. In order to achieve an acceptable A-P spread in these patients, I have to literally stretch my implant placement as far distally as possible, and extend the osteotomy path directly along the anterior sinus wall. In these cases, I am drilling my osteotomy exceptionally close to the anterior extent of the sinus. Therefore, I want to confirm that as I increase my drill size – I am not opening up the distal wall of the osteotomy to communicate with the anterior sinus. In order to evaluate this, I drag the periodontal probe tip from the base of the osteotomy, backward, up, and out toward the crest. In this way, the tip will drag along the distal osteotomy wall and either confirm the presence or absence of intact bone in this portion of the osteotomy.
Second, there are also cases that require placement of mandibular posterior implants #20/29 to be extremely close to the mental foramen in order to achieve acceptable A-P spread. In this scenario, similar to the above technique, I drag the tip of the perio probe from the apex of the osteotomy up and out toward the crest. I maintain contact with the tip of the perio probe and the distal osteotomy wall. If I can feel intact bone throughout, I know that I have not violated the mental foramen and underlying inferior alveolar nerve canal. If I feel a drop and/or a spongy feeling – I have very likely entered the inferior alveolar nerve canal and have made contact with the inferior alveolar nerve. Intra-operative adjustments are then made as necessary.
While the periodontal probe may not be the flashiest or most exciting instrument on the surgical tray, in my opinion it is one of the most practical and most valuable to an All-On-X surgeon.
If you haven’t given this instrument a try lately, go ahead and dust it off. Give the ol’ perio probe a chance. You won’t regret it.
Here’s to AOX success beyond “measure”…
Matthew Krieger DMD
P.S. I assume the following goes without saying – but I’ll say it anyway. While I have indicated that I take horizontal measurements on the panorex image – I of course do a thorough review of the entire CT scan and utilize the CT scan for treatment planning as well. I am not “only” using a panorex image for my AOX cases. It is simple one view and one tool that I use as part of the “imaging work-up”.
How are you handling the magnification (~25%) of the pano and the fact you are making a flat measurement on the pano, but the actual arch is curved? Have you concluded these discrepancies are not materially relevant at such short distances? Thanks!!
Great question Brian! First of all – I had these same concerns myself when starting to use this method. However, it appears to be insignificant as the “flat” measurements taken on the pano seem to be spot on when transferred to the jaw clinically.
I will admit that I don’t have a “scientific” explanation as to why it works – but for me it has worked exceptionally well.
I should preface that I have only ever used the i-CAT Pano/CT system. So I honestly don’t know how this translates on other Pano/CT systems.