I extract all teeth in the arch before I make my surgical incision.
Cue the “Gasp”?!
I realize that I am in a very small minority, if not a loner when it comes to this technique.
I did not always perform surgery this way. I used to be like many of you…an incision first surgeon.
Early on in my career, while watching a much more experienced surgeon, I realized the error of my ways.
From that day forward, I vowed to leave the herd and take the lonely, but incredibly beneficial path of Teeth First, Incision Second…
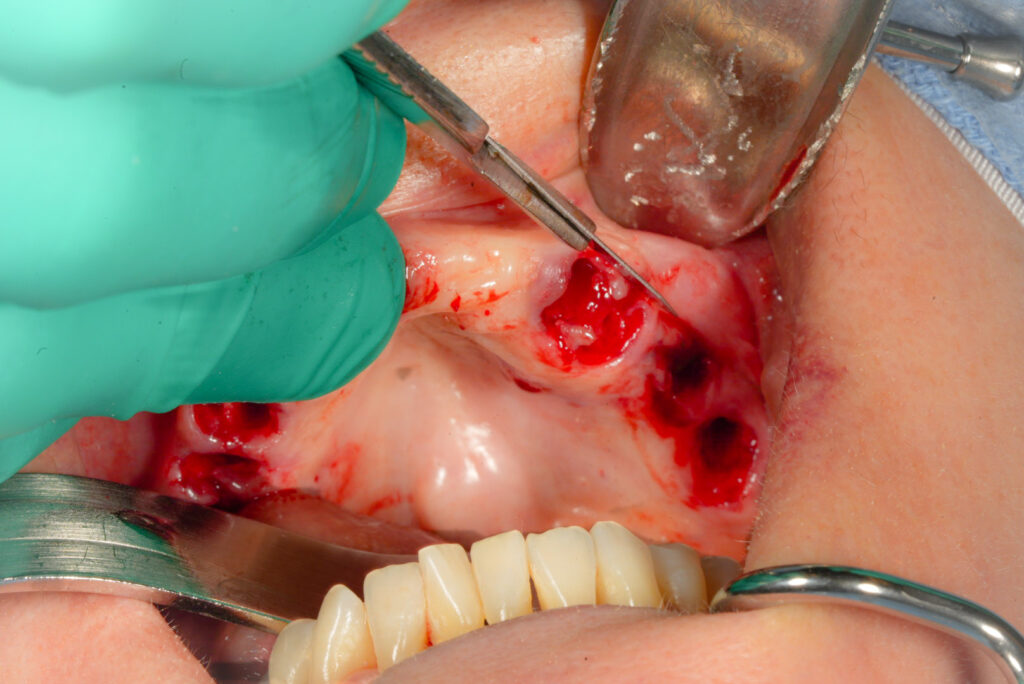
Now, after I administer local anesthesia, I proceed to remove each tooth and or root with an elevator and forceps (with the exception of small or fractured root tips, which I get after bone reduction).
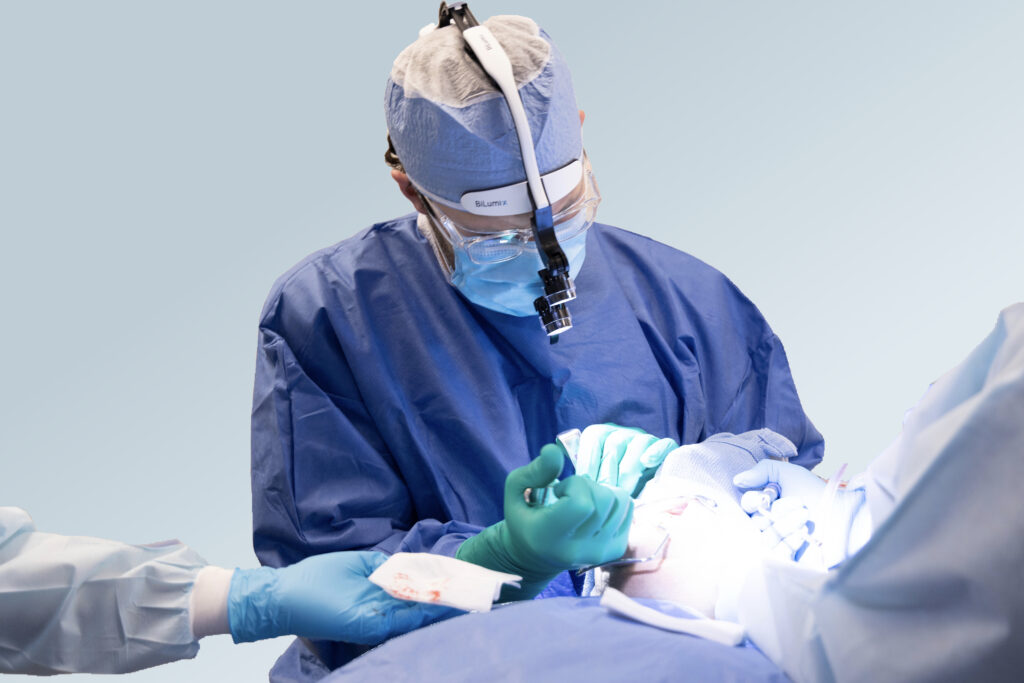
Only after the teeth in the arch are out, do I then turn my attention to the incision.
For the purpose of this article I will focus on why I prefer this order (and why you should too)...
For a detailed explanation of how I make my incision keep your eyes out for an upcoming article: How I Perform My All-On-X Incision to Create Optimal Closure
Why Teeth First & Incision Second?
There are many perks of removing the teeth first and performing the incision second. Below is a list and explanation of each.
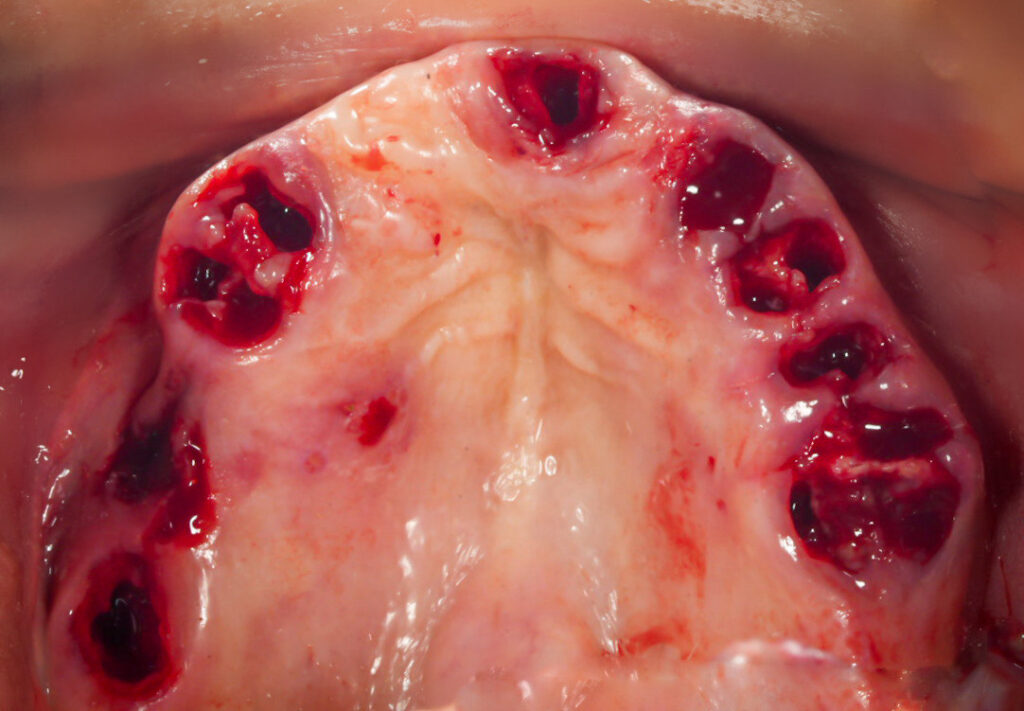
1. It is easier to make an exact incision.
In order to optimize closure you will need to remove the interdental papilla, but save keratinized tissue while doing so. I find it much more difficult to do this with the dentition in place.
Trying to fit your blade in and around the cervical anatomy of the teeth can be difficult. This may lead to incomplete incision depth and subsequent tearing of tissue upon reflection.
With the teeth removed, you have improved visual and surgical access for your blade. This creates a simple, repeatable, exact incision with minimal to no tears and optimal re-alignment for closure.
2. The angles are in your favor.
With the dentition removed you are now free to place your hand at whatever angle is optimal for the desired movement and instrumentation.
With the teeth in place you are forced to work with your blade at a 45-90 degree angle.
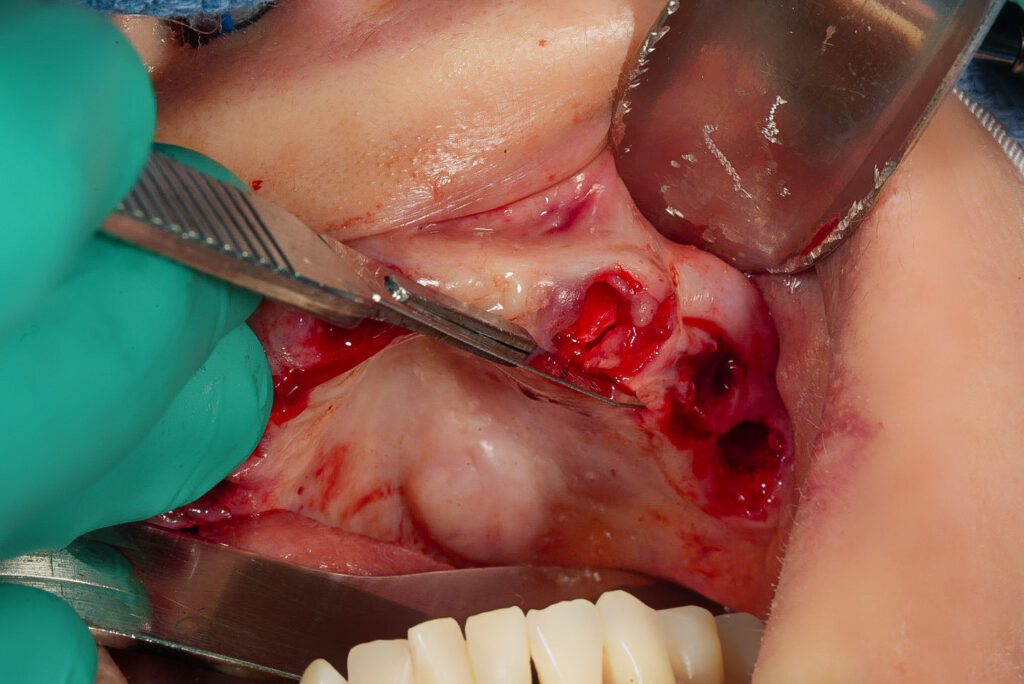
With the teeth removed first, you can freely lean the blade handle in any direction without dentition interference.
Furthermore, you can work at a more vertical angle with both your blade and periosteal elevator when beneficial.
I find a more vertical positioning of the 15-blade and periosteal elevator is better in the following situations:
It allows for precision papilla removal while maintaining keratinized tissue. I often cut down at a more vertical angle onto the alveolar crest instead of at a 45-90 degree angle. This is most often true in the posterior and palatal aspects but can be done anywhere it’s advantageous.
In addition this technique also lends to a more delicate and efficient flap reflection. I find being able to upright my periosteal elevator vertically and even leaning palatally/lingually into the previous dentition space leads to far less tissue tears and a more efficient flap reflection. This is not possible with the teeth in place.
3. It is easier to make a “straight line” for closure.
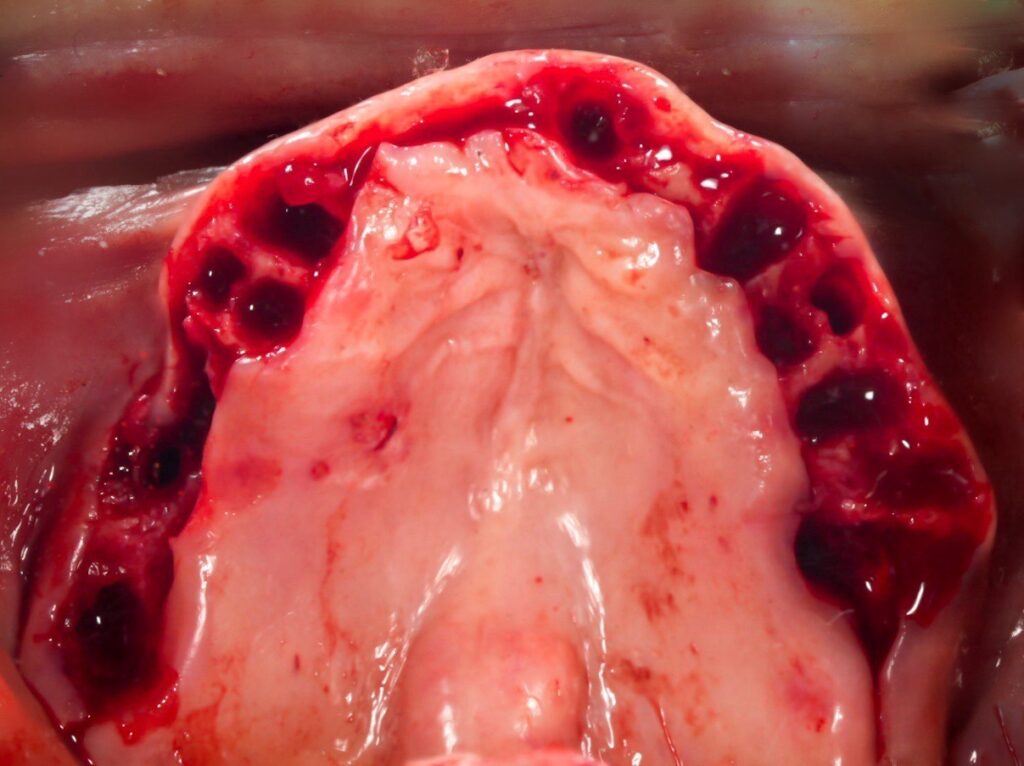
In order to have ideal tissue re-approximation you will want a smooth, straight line of gingival tissue that follows and wraps around the arch. When approximated after reduction and implant placement it should come together evenly.
I find this very difficult to achieve if the flap is reflected first. In this scenario you are trying to hold the tissue in a tissue forcep and remove the papilla with a blade or scissor at the end of the case.
While doable, this tends to lead to lumpy, uneven tissue because you are holding the tissue out in space and have lost your reference of the arch form. When reapproximated this incision may have inadequate tissue in some spots, and excess tissue in others.
In comparison, with the teeth removed, papilla removal at the time of incision can be easily accomplished. This is more efficient and exact.
With this technique, my goal is a very straight, smooth line of facial gingival tissue (with as much keratinized tissue as feasibly possible).
While I also want as smooth and straight a line of palatal tissue, note that it is normal for the facial tissue to be “straighter” than the palatal tissue. I do remove the palatal papilla but let the remaining tissue follow a somewhat natural contour. Why? Too much removal of the attached palatal tissue can make primary closure difficult.
4. Less bleeding.
We all know that the epinephrine in our local requires time to take effect. However, we do not always allow the epinephrine time to do its job. This is especially true for those of us who do this procedure under general anesthesia.
Removing the teeth prior to incision allows us to start our surgery right away – no time wasted. However, the 5-10 min you spend removing the teeth will allow the local and epinephrine to sit in the tissue and exhibit not only its anesthetic effects but its vasoconstrictive effects too. This helps limit intra-operative bleeding.
In comparison, if a flap is reflected right after local administration you are going to “spill out” a large amount of your local anesthetic and epinephrine. This will not only hinder the duration and effectiveness of the anesthesia, but it will also create more bleeding.
5. Less swelling.
The longer your flap is open, the more swelling you will have.
The less swelling you have, the less post operative pain your patient will have and the easier it will be for your restorative doctor to manage the postoperative tissues and perform the pick up.
Making incision after you remove teeth probably doesn’t seem like it would make that much difference. But let’s take a look…
As your experience grows you will become more efficient with this procedure.
It takes me, on average, 45-60 min to complete an arch.
Let’s assume 5-10 min for removal of teeth depending on difficulty.
If I make incision after removing those teeth, the flap remained closed for an extra 15%-20% of the case.
That’s an extra 15%-20% reduction in the total time the flap was open! This is time directly related to edema/swelling. Related to percentage of time, that’s a big difference!
This is absolutely one of the most wonderful benefits of this technique.
Well…what are you waiting for?
Are you ready to leave the herd and head out on your own?
A Teeth First & Incision Second Surgeon…
Matt Krieger DMD
P.S.
A special thank you to Dr. Nate Baxter for teaching me this technique many years ago. It has forever changed the way I perform AOX surgery.

Pingback: What I’ve Learned After 1500 Arches…That I Wish I Knew for My First Arch - AOX Surgery
I enjoy your posts. I’m just getting into the full arch world and this tips are invaluable
Thank you for the feedback Dr. Sharp! Glad you are enjoying and benefitting from the content!
Get in and out as cleanly and efficiently as possible optimizing post op.
Very solid points Matt
Pingback: My AOX Setup: What Instruments I Use & Why - AOX Surgery
Pingback: Difficulty Achieving Primary Closure… What Do I DO Now?!? - AOX Surgery
any tips on lower arch flap design and closure after bone reduction and implant placement
Stay tuned for an upcoming article that will address this topic in more detail than I can in this comment! Thanks!
In the edentulous areas between dentate spot, are you just doing a straight line incision with no tissue removal generally?
Thanks
Hi Paul,
In edentulous areas on *dentate patients, I try to remove a strip of tissue on the ridge that will account for the bone reduction in this area. So I carry my incision across this area on both a palatal and buccal aspect (2 incision lines) and then remove the strip of tissue in between.
In completely *edentulous patients I normally just make one incision line and do not remove any tissue (there are very rare cases of edentulous patients that require a lot of bone reduction – in these patients I will remove a strip of tissue).
Pingback: How I Perform My AOX Incision to Create Optimal Closure - AOX Surgery
Any tips for efficient full arch extractions? The reason I flap first is so I can also reduce the bone to my reduction line on the buccal and interproximal and the teeth are much easier to remove at that point
Hey Shaun,
Extraction technique might be a difficult one to explain in a simple reply. I do have a lot of experience with extractions as an OMFS and this is an area I am very comfortable with which is one reason this technique works well for me. I essentially elevate teeth with a straight elevator and then remove with a 150 forcep and Ash forcep. That’s really all I typically do/utilize.
While the technique you mentioned is very popular, I don’t like it for many reasons (as referenced in the article). But I also don’t like the “flap first” method because you are essentially doing your bone reduction three times… You are reducing with your bur on the buccal…you are then reducing with your bur on the inter-proximal… and you are yet again reducing after the teeth come out. I don’t find this to be efficient.
That being said, this technique is not wrong, and is simply a matter of preference.
There is a fine balance between efficiency with extractions and efficiency with bone reduction. If you feel that you are not able to consistently remove the teeth efficiently prior to flap reflection, and this therefore causes more lost time – then maybe a flap reflection first is the more efficient technique in your hands. Again, this is not wrong. It’s just different than I prefer.
With practice, you will get more efficient and more confident removing teeth without a flap. And there are times, while very rare, that I still reflect a flap prior.
I know this didn’t answer your question exactly, but I hope it helps a little.
Pingback: Why I Can’t Operate without a Perio Probe - AOX Surgery
Pingback: Exactly How I Close My All-On-X Incision - AOX Surgery
Hi Matt,
Thank you for sharing your knowledge in these articles – they came highly recommended and I see why.
Here’s my question – do you ever run into issues with a lack of KG in an area and feel the need to do any connective tissue grafts using the KG that has been removed from other areas?
Thanks in advance
Hi Jake – thank you for your question and for checking out the blog.
I have yet to have to perform any type of soft tissue graft. Honestly, I thought I would have had to by now but it has not been an issue for me in the last 6 years of full-arch surgery. I will say that I had one patient who did have sensitivity on a lower posterior implant and I could not ascertain why. My only thought was that it could be related to a lack of KG. However, when I offered a soft tissue graft to this patient they declined as they said it did not bother them enough to want to perform another surgery.
In short – it’s not something I really see. I imagine at some point I will need to perform one but it is not common. I will also add that when making my incision I am trying to focus on removing the interdental papilla, but I am also trying to maintain keratinized tissue as much as possible.