A recent @aoxsurgery post on Instagram asked what questions you may have regarding full-arch surgery that you would like answered here on the blog. I received a lot of great questions and it’s my goal to respond to all of them. In order to make it more manageable for me to write, and easier for you to read, I have broken down my responses into two blog posts (today’s post – as well as the next blog post).
I would like to add that there were a couple of great questions that were not included. This is only because they revolved around incredibly in-depth topics, and as such are planned to be addressed as entire articles in the future.
Well, let’s get going!
Below are your questions and my responses on how I would handle the proposed surgical situations. Please keep in my mind that there are always multiple full-arch opinions. These responses simply highlight how I prefer to operate.
Your Questions:
1. I placed my first palatal root implant and it had around 25 N-cm of torque. I buried it and I am planning to load it after 3 months. How would you handle a low torque palatal root implant? And, do these implants ever get lost in the sinus?
I love palatal root implants and use them often! I am normally able to achieve consistent torque with these implants in the range of 45-60+ N-cm. I will say that doing so does take practice and is its own skillset. Please reference this article for more on my palatal root technique.
While there are instances in which adequate torque is not achievable, this is not common. If I am unable to achieve a torque of 30 N-cm or higher – I will usually back the palatal root implant out. I do not have confidence in loading the implant at lower torques. In these situations, I will look for other options like a pterygoid implant.
That being said, there are times where I have had an extremely difficult, low density or atrophic case where the patient happened to also present with an existing molar and palatal root socket. As an example scenario, I may have been able to get the traditional four implants (4/7/10/13) placed with a composite torque of 120 N-cm or greater, but without significant torque beyond that number – let’s say torques of 30, 25, 35, and 30 N-cm respectively. I am not a fan of zygomatic implants, so in these cases I may opt to place a palatal root implant – even in low density bone and bury it. It is simply acting as a “back-up”. I may not ever actually uncover it – if the patient heals uneventfully. However, should a posterior implant fail (4/13), I know I have an integrated “out” that I can use to immediately load the prosthetic while I figure out how to manage the implant failure. This can avoid the need for a zygomatic implant – which I feel is a more optimal situation in my hands.
I have never displaced a palatal root implant into the sinus. However, I have heard it done. I am very careful with the insertion of the implant and I never “push the implant”. This is also a reason, however, that if the implant does not torque well – I typically remove it. While I am not necessarily worried that I will push the implant into the sinus, I am worried that the prosthetic team may inadvertently dislodge a low torque implant into the sinus during the pick-up.
Finally, I typically wait 4 months to uncover and load a buried implant. Honestly, 3 months is probably fine. That being said, I rarely bury implants. And, when I do, it’s because a case was incredibly difficult and I know that I “need” that implant. So I don’t see the point in “pushing the envelope” on how fast I can uncover the implant. I’d rather the patient wait 4 more weeks and be closer to the 4 month mark for uncovery and loading.
2. In your newsletter you mentioned that the presence of an oral antral communication can prevent placing a palatal root implant. Can you please explain this further?
There are two ways in which an oral antral communication can make placing a palatal root implant either impossible and/or “problematic”.
First, in the particular article referenced I explained that a lone standing molar in an atrophic maxilla represents a higher than usual risk for a buccal plate fracture and /or fracture of the alveolar crest. If these molars are not removed with caution, they can create a large OAC and/or alveolar crest fracture at the molar root site. This type of “fracture” and large OAC will effectively eliminate the palatal root. Without an intact socket, you have no where to place your implant. You simply have a large hole (larger than your implant) extending into an open sinus. In this scenario, the site becomes unusable and the priority shifts to simply managing the OAC on hand.
The second scenario is that you create a notable OAC directly adjacent the palatal root socket. In this scenario you can absolutely still place the palatal root implant into the intact socket. However, the concern is, are you going to be able to get water tight closure over the OAC and prevent a chronic non-healing communication?
An OAC around an immediately loaded implant site can be very difficult to successful close and achieve predictable healing. It can definitely be done. But, it takes experience and surgical skill – as well as close follow up.
In this second scenario, I would rather move further away from the OAC site and look at something like a pterygoid implant. This allows me to more easily and predictably achieve true primary closure over the sinus communication site and therefore provides a much higher probability of adequate closure and healing following the initial surgery. If I felt I truly needed to place the palatal root implant adjacent a large OAC, I would try to create a scenario in which I could immediately load with the implants I had elsewhere. I would then bury the palatal root implant and plan uncovery in 4 months. In this way, a water-tight primary closure would still be able to be obtained over the OAC.
My last choice would be to immediately load an implant directly adjacent a large OAC, providing a continued “open” path for chronic fistula formation. (I want to be clear that this is my “least desirable” scenario…but I’m not saying that I’ve never done it).
As a side note, a small communication (~2-3mm) at the apex of the palatal root socket is not typically a concern. This will often happen anyway with creation of your osteotomy within the socket and your implant will primarily close the communication mechanically. The goal, however, is always to keep the membrane intact regardless of the bony opening at the apex of the socket.
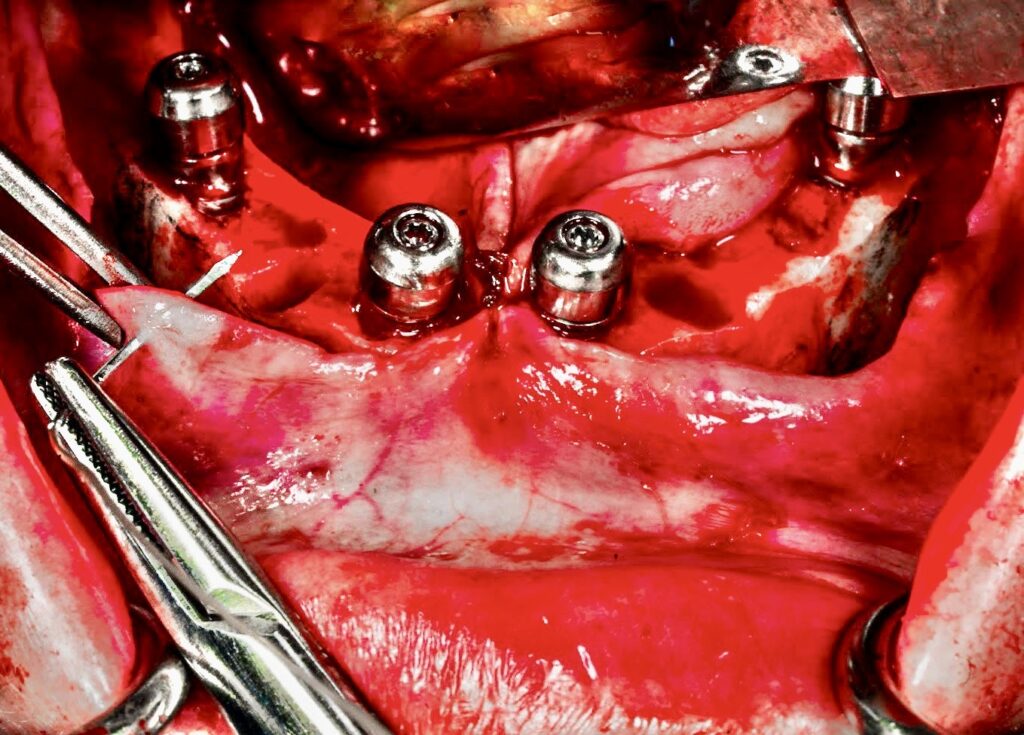
3. What is your technique for closing the mandible? Do you use transosseous sutures? And if so – why?
This is a great question and one that I can answer in exquisite detail by referring you to the following two articles:
“Exactly How I Close My All-On-X Incision”
“How to Secure Your Mandibular Tissue During Closure”

4. How do you know if you “overheat” the bone at an osteotomy site?
Well, the obvious answer is that if you are truly “overheating” the bone you can/will see some color changes in the bone at the osteotomy site (typically a brownish color). You can also overheat the bone during reduction and this will not only create a discoloration but also a “burned bone” smell and you will note an almost smoke like small particulate bone debris in the air (due to a lack of irrigation maintaining the bone debris at the surgical site).
So in short…it should be fairly obvious.
If you are using adequate irrigation, drilling at the manufacturer’s recommended protocols or lower, and using proper instrumentation – this should be incredibly rare and not something I would worry significantly about.
I cannot recall a time that I truly felt I “overheated” an osteotomy site.
Here are the steps that I take to ensure this doesn’t happen:
- I use a high quality implant system and a high quality drill/drilling unit (actually designed for oral & maxillofacial surgery and not just “dental” surgery). This makes more of a difference than you think.
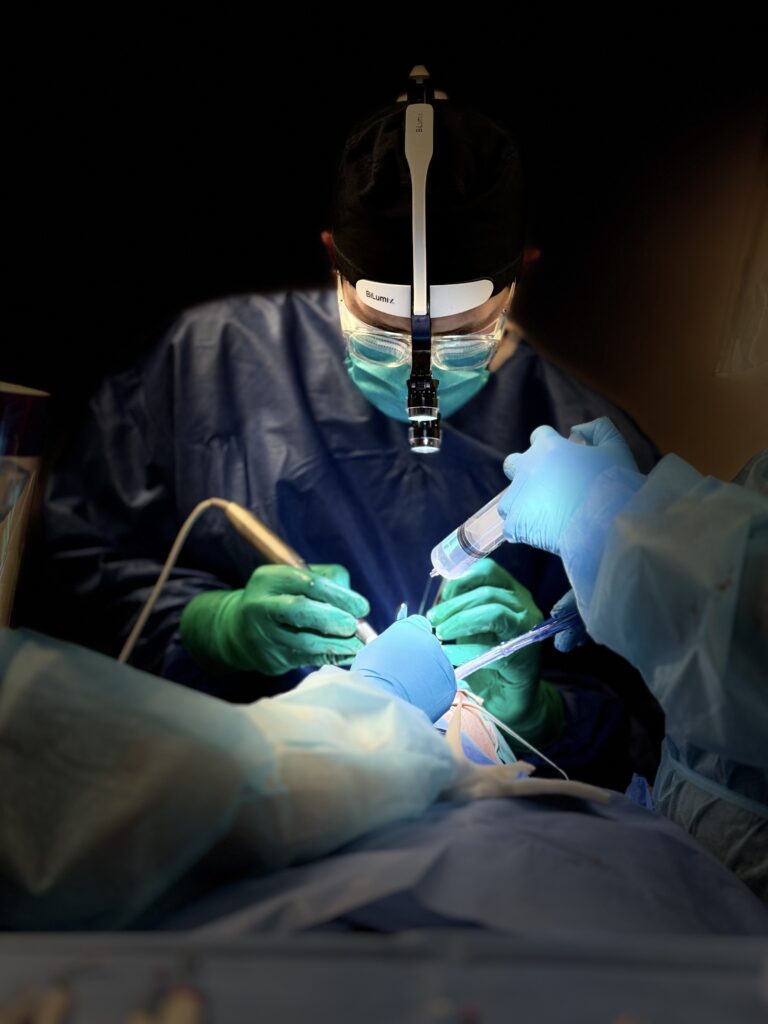
- I have my assistants manually irrigate while I use the handpiece. If you’ve noticed in my photos there’s always someone holding a 60cc syringe with saline for irrigation. I do not like drill mounted irrigation systems. They do not always angulate the irrigation into the appropriate spot depending on how the drill is held. They can also easily over or under irrigate. An assistant manually performing this task does take an extra hand but it ensures the irrigation flow is directly on the anatomical location I want it on and allows my assistant to increase or decrease irrigation flow depending on what I am doing.
- I drill slowly. This is the biggest reason I really don’t have any issues with overheating of osteotomy sites. Here’s an entire article on why I feel what I call the “Low RPM Osteotomy Technique” has a plethora of benefits.

5. Regarding the Neodent drill system, in the posterior mandible with a very wide ridge and type IV bone, what is your drill sequence/strategy to achieve immediate load capability? For the sake of this question, assume that you cannot engage the inferior border or the cortical walls – simply the medullary bone.
This is a great question and also proposes a surgical situation that is difficult to handle given that engagement of the inferior border and/or buccal and lingual cortices are NOT an option in this theoretical scenario.
So before I respond to how I would handle this particular situation, I want to touch very briefly on both the referenced inferior border and buccal and lingual cortices techniques.
I know that engagement of the mandibular inferior border with an extra long implant is becoming a popular technique. This however, is not a technique that I am a fan of and not one that I utilize. I actually attempt to avoid this technique altogether.
I have seen some significant complications arise from patients who have received treatment from other providers with an implant that fully engages and/or passes through the inferior border of the mandible to increase torque. These complications have ranged from jaw fracture, to osteomyelitis, to neck infections, to painful implants that are unable to be removed in the outpatient setting due to integration at the inferior border and concern for intra-operative jaw fracture.
Does this mean that complications always occur with this technique? No – it does not. But, it is my opinion that this technique should be used with caution. I do know some very experienced surgeons that use this technique, that do so with caution, and can manage the complications that may arise. However, my advice for most practitioners: I would be very careful with purposefully engaging the inferior border of the mandible.
And, regarding the buccal and lingual cortices – engagement of these dense cortical walls is usually my go to in a low density mandible. Using an extra wide implant like the 7mm implant offered by Neodent, is a great way to generate torque in mandibles that are otherwise complete medullary mush. However, there are times where the ridge is wider than the widest implant. If the ridge is 10mm wide, a 7mm implant will not engage the cortices.
So, in this particular question posed we have established that we are not using the inferior border. We have also established, for the sake of argument, that we cannot use the buccal and lingual cortices because the ridge is wider than our widest implant….
Here’s what I do in this scenario (and yes, this is a very real scenario) :
- Significantly under-prep. This really goes without saying, but it’s absolutely worth noting. One of the benefits of the “Low RPM Osteotomy Technique” is the tactile sense it provides of the surrounding bone and the ability to adjust your osteotomy preparation to that density. In truly low density, heavy medullary, “hollow” bone, I will use a starter drill and a 3.5mm drill and that’s it. I will then typically place a 5mm implant of the longest length possible (Helix – normally not Drive). If I am not happy with the torque, I will then move straight to a 6mm diameter implant with the hope that placement of the 5mm implant has compressed and compacted the surrounding bone and has helped (ever so slightly) increase the density at the osteotomy site.
- Place the longest implant possible, without engaging the inferior border. As noted above – I avoid engaging the inferior border. However, I still want as long an implant as possible in a low density case (while avoiding the inferior border) because a longer (and wider) implant helps improve the chance of achieving a higher insertion torque. Furthermore, the mandible often narrows as you get closer to the inferior border. So if I’m able to place a 5×16 mm Helix at site #29, as the tip advances forward and downward, the longer implant has a greater chance of generating torque via compression from the “narrowing” buccal and lingual plates toward the apex of the osteotomy.
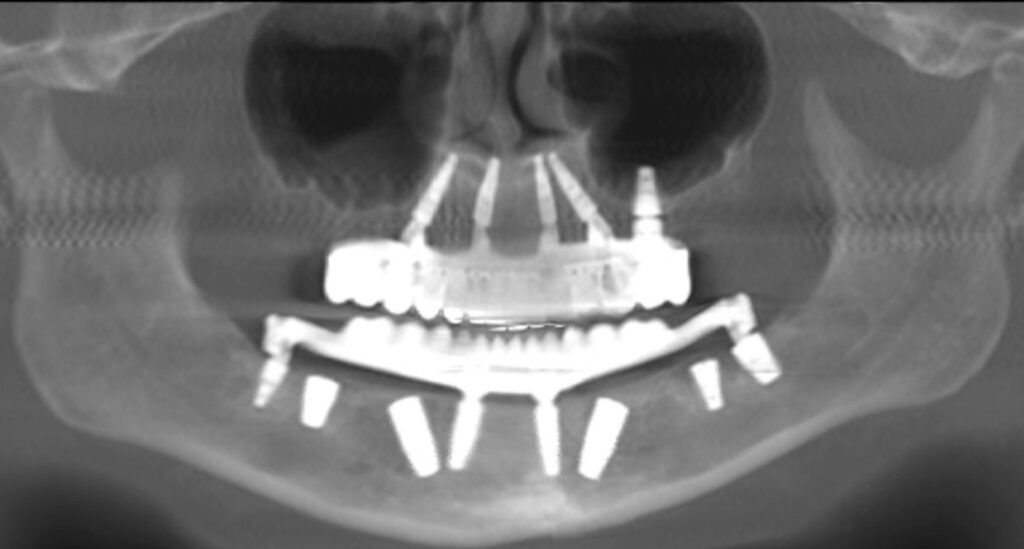
- Angle everything. The shortest distance between two points is a straight line. We established above that in low density cases a longer implant can be very beneficial. So I avoid anything “straight” and angle my implants in order to add that extra 1.5-3mm of implant length obtained by the increased angulation. I even angle “short implants” distal to the foramen. If I’m placing a 5x8mm or a 5x10mm Helix at site #19/30 – I’m always angling at ~17-30 degrees to increase length availability as well as avoid the inferior alveolar nerve canal.
- Angle my implant slightly more than 30 degrees. In order to increase implant length even further, at sites #20/29 I will often angle a bit more than 30 degrees. This may be the difference between being able to place a 5×13 and a 5x16mm implant (without engaging the inferior border).
- Ride the cortical wall. In extremely low density, large medullary cavity cases I will often place my implants purposely to one side of the ridge or the other – not in the center of the ridge. This allows one side of the implant threads to ride along either the buccal or lingual cortex. In so doing, it helps the implant “carve” a path into this denser cortical bone and can help improve otherwise low torque.
- Use an existing socket. In a significantly low density arch, if a portion of an existing socket remains, I will always attempt to start the implant osteotomy inside that socket – even if spread could be improved by going posterior to the socket. Each socket is lined with a thin layer of cortical bone, and in these low density cases you will find that torque will be slightly higher inside a socket than outside the socket.
- Move posterior and use a bar extension. Finally, if all else fails, I will move significantly posterior in the mandible to the third molar region and place a short angled implant (with care to avoid the IANC). I have noted on multiple occasions that even in low density cases – density tends to increase as you approach the third molar/ramus region. In these cases a bar extension is used to reach this implant site and allow the patient to be immediately loaded. Other implants in traditional locations are buried if necessary. Following 4 months the third molar implant can be buried and the “traditional” implants loaded – allowing the bar extension to be removed from the prosthetic for improved patient comfort.

6. What is your advice for doctors that can only utilize local anesthesia? How can we adequately control and manage pain during full-arch surgery?
Before I get into how I have/would manage local anesthetic full-arch cases, I would like to state the following:
I have done full arch surgery with local anesthesia, IV conscious sedation, IV moderate sedation, IV deep/GA sedation, and with general endotracheal anesthesia. Having experienced all facets of anesthesia relating to full-arch surgery, I can say without a doubt that using only local anesthesia for this level of surgery is not optimal for either the patient or the surgeon – in most cases.
There are absolutely some patients who are not good anesthesia candidates and a local anesthetic (or a hospital based anesthetic) is the better option. However, I have so rarely performed this style of surgery because most patients, in my experience, do not want local anesthesia and opt for other less invasive treatment options in the absence of sedation.
I would also like to add that if you are less experienced at full-arch surgery, local anesthesia is a very difficult and intimating way to learn for both you, your team, and your patient.
That being said, at times I have performed full-arch surgery with only local anesthesia. Here’s how I did it, and how I prefer to do it should this be the only option.
- I prefer to only treatment plan single arch patients for local anesthesia. Doing a double jaw case with local is very difficult and takes a lot of experience to be able to move quickly enough that your local anesthetic is not wearing off.
- I work efficiently with my surgical team. No wasted movements or downtime. Efficiency is paramount to success with local anesthesia. If you cannot consistently cut an arch in 60 minutes or less – you will struggle getting through these cases with local. Patients will become uncomfortable, your local will start to wear off, you will worry that your giving too much local in too short a time period to keep the patient comfortable… It can become a nightmare. If you plan to use local anesthesia often, prioritize training your team to work efficiently as one unit.
- Even with the experience that I have, I’m very selective on which cases I will treat with local anesthesia. I must not only consider what I can do surgically, but I must also consider the experience the patient is going to have and what they can or cannot realistically tolerate. I’m not going to select a local anesthetic patient that is near fully dentate with crowns and root canals, and is also a complex case likely to require pterygoid implants. That is a lot – for anyone to sit through with local anesthesia. I want near edentulous cases that “appear” to be straightforward with a traditional 4 implant configuration planned.
- I’m aware that medically complex patients may not necessarily be local anesthetic candidates either. While there are definitely patients that are not good outpatient sedation candidates, this does not mean that those same patients are “automatically” good local anesthesia candidates. I use caution when selecting local anesthesia candidates for full-arch surgery, especially if they are also significantly medically complex patients.
For example, is it “ideal” to have a significantly cardiac compromised patient with a history of recent MI, HTN, and CHF in your chair for a 3 hour jaw surgery with local anesthesia that requires you to give 15 carpules over that time period to keep them comfortable enough to finish the case?? And if you don’t give more local anesthesia because you are worried you are reaching a max dosage threshold, you now have a cardiac compromised patient releasing large amounts of endogenous epinephrine due to anxiety and pain and having significant increases in blood pressure and heart rate while in your chair… Local is not “automatically” safer.
- My final recommendation and strategy would be to avoid local anesthesia as the “only option” by considering the use of a CRNA, Dental Anesthesiologist and/or MD Anesthesiologist for assistance with these cases in your office (Your license and local board regulations will dictate who you can/cannot use). Yes it will cost you more money. However, if you are learning full-arch surgery, it will be invaluable in allowing you to focus on your surgery and provide your patient a comfortable experience.
While local anesthesia is always (and should always be) an option, it is my opinion that it is a difficult scenario in which to create an optimal surgical environment for the surgeon, while also creating a great experience for the patient. To do so consistently requires significant experience and efficiency.
That being said, I want to clarify that I am not advocating that dental providers take a “sedation course” and sedate their own patients. It is my advice and opinion that engaging the services of a separate, qualified anesthesia provider is the better option if you are not an anesthesia trained oral & maxillofacial surgeon. Even as an OMFS, I choose and prefer to utilize a focused anesthesia provider for my full-arch cases.
Furthermore, while I do not prefer the use of “local anesthesia only” as a full-arch treatment modality, I would like to say that I appreciate this question because it tells me that you are staying in your lane and providing an anesthetic option that you feel is safe. I fully respect that and applaud you for doing so. It is always a better option to provide local anesthetic in a safe/optimized environment than it is to provide any form of sedation when you are not trained or comfortable in doing so.
I will leave you with the following,
Be confident, but be humble.
Be adaptable, but be prepared.
Feel accomplished, but know that your most difficult arch has yet to come.
Matthew Krieger DMD


Pingback: Your AOX Questions Answered (Part 2) - AOX Surgery
Excellent explanation as usual , very formative , learning a lot of tips , thank you
what is your thought of using Densah burs Osseodensification burs for low density bone in the mandible and maxilla
Hey Dr. Akhikar –
I have heard that a lot of practitioners love Densah burs. Embarrassingly enough… I have never actually used them. I have never been part of a practice that has had them and I quite honestly haven’t found a significant need in my day to day practice where I feel that I would consistently benefit from them. In my hands, I focus on my control of how the osteotomy is prepped and/or under-prepped and implant selection, angulation, and anatomical bone engagement to try to improve torque. That’s just because that’s what I’m used to – as I’ve never had the Densah burs. Maybe I’m missing out??